Neil Matthews

Category: General Blogging

  • How I Control Access To The WooCommerce REST API

    How I Control Access To The WooCommerce REST API

    In this video post I’ll show you the plugin I like to use to control access to the WooCommerce REST API endpoints.

    Using the following plugin I can deny access, grant full access to grant granular access to an endpoint depending upon whether you are logged in or have a certain role on my site.

    Disable Rest API Plugin

    Video

    Wrap Up

    The same results can be achieved by adding code to your site, but I find this plugin allows you to monitor for new endpoints, if you add a new plugin for example and doesn’t require constant updates to code, jsut the click of a toggle box on an endpoint.

    If you need help developing a rest API solution for your WordPress site please get in touch.

    Photo by Eduardo Soares on Unsplash

  • A Complete Guide to Optimizing WooCommerce for SEO

    A Complete Guide to Optimizing WooCommerce for SEO

    Search Engine Optimization (SEO) is one of the most critical factors in driving traffic and boosting sales for your WooCommerce store. If you want your products to rank well on search engines like Google, optimizing your WooCommerce store for SEO is essential. This comprehensive guide will walk you through the key strategies to optimize your WooCommerce store for SEO, helping you improve your rankings, attract more traffic, and increase conversions.


    1. Optimize Product Titles and Descriptions

    The titles and descriptions of your products are one of the first things search engines and potential customers see. Optimizing these fields with relevant keywords helps both Google and your visitors understand the value of your products.

    Best Practices for Product Titles:

    • Use Primary Keywords: Include your target keyword at the beginning of the title.
    • Keep It Concise and Descriptive: Aim for titles that are between 50-60 characters for maximum effectiveness.
    • Focus on User Intent: Ensure the title reflects what a customer might search for.

    Product Description Optimization:

    • Incorporate Keywords Naturally: Avoid keyword stuffing and ensure the product description flows naturally.
    • Highlight Benefits and Features: Write descriptions that explain the benefits of the product, while also weaving in keywords.
    • Use Bullet Points: Break up long descriptions with bullet points or short paragraphs to make them more readable.

    2. Optimize Permalinks and URLs

    WooCommerce allows you to customize your product URLs, which can impact your SEO. A clean, descriptive URL structure is easier for both users and search engines to understand.

    Best Practices for SEO-Friendly URLs:

    • Include Target Keywords: Incorporate your primary keyword in the URL.
    • Use Hyphens Instead of Underscores: Google prefers hyphens over underscores to separate words in URLs.
    • Keep URLs Short and Descriptive: Avoid unnecessary words like “the” or “and” and focus on creating concise URLs.

    To customize URLs in WooCommerce:

    1. Go to Settings > Permalinks in your WordPress dashboard.
    2. Choose the Post Name structure for a clean and readable URL format.

    3. Install an SEO Plugin

    One of the easiest ways to manage SEO for WooCommerce is by installing an SEO plugin. The two most popular SEO plugins for WordPress and WooCommerce are Yoast SEO and Rank Math.

    Benefits of Using an SEO Plugin:

    • On-Page Optimization: These plugins guide you through optimizing your product pages, category pages, and blog posts for SEO.
    • XML Sitemaps: They automatically generate XML sitemaps, which help search engines crawl and index your site.
    • Breadcrumbs: Enable breadcrumbs, which improve navigation for users and help search engines understand your site’s structure.

    How to Set Up Yoast SEO for WooCommerce:

    1. Install Yoast SEO: Go to Plugins > Add New and search for “Yoast SEO”. Install and activate it.
    2. WooCommerce SEO Integration: Yoast integrates with WooCommerce seamlessly, offering additional WooCommerce-specific SEO settings, such as structured data for products and breadcrumbs.
    3. Focus Keyword: For each product, Yoast will allow you to set a “Focus Keyword” and provide optimization suggestions based on that keyword.

    4. Optimize Product Images for SEO

    Images are a key part of any eCommerce store, but they also provide an opportunity to improve SEO.

    Steps to Optimize Images:

    • Use Descriptive File Names: Instead of uploading images with generic names like “IMG001.jpg,” use descriptive file names that include your keywords, such as “blue-leather-shoes.jpg.”
    • Add ALT Text: Search engines can’t “see” images, but they can read the ALT text. Include relevant keywords in your ALT text to help your product images rank in search engines.
    • Compress Images for Faster Loading: Large image files can slow down your site. Use plugins like Smush or ShortPixel to compress images without losing quality.

    5. Improve Website Speed and Performance

    Page speed is a direct ranking factor for Google. If your WooCommerce store is slow, it can negatively impact your rankings and cause potential customers to leave before they even see your products.

    How to Improve Page Speed:

    • Choose a Reliable Hosting Provider: Invest in a high-quality hosting provider that specializes in WooCommerce stores, such as SiteGround or Kinsta.
    • Use a Caching Plugin: Plugins like WP Rocket or W3 Total Cache can significantly improve loading times by caching pages and reducing server load.
    • Minimize CSS and JavaScript: Use tools like Autoptimize to minify CSS, JavaScript, and HTML files to reduce load times.
    • Enable Lazy Loading: This ensures that images load only when they are visible to the user, improving initial load time.

    6. Optimize Category Pages

    Category pages are just as important as product pages when it comes to SEO. Optimizing them can help search engines understand your product offerings and improve rankings for relevant search queries.

    How to Optimize WooCommerce Category Pages:

    • Unique Meta Descriptions: Write custom meta descriptions for each category that include relevant keywords and encourage users to click.
    • Use Headers Effectively: Include H1 and H2 headers with your main keyword on category pages.
    • Add Content: Category pages often lack content. Consider adding a brief description at the top of the page to explain the category, including keywords naturally.

    7. Use Structured Data Markup

    Structured data helps search engines understand the content of your WooCommerce store better. It can also make your product listings appear in rich results, like product reviews, prices, and availability in search results, giving you a competitive edge.

    How to Implement Structured Data:

    • Yoast SEO and Rank Math: Both plugins automatically add structured data (schema markup) to your WooCommerce product pages, so you don’t have to code it manually.
    • Test Your Structured Data: Use Google’s Rich Results Test to ensure that your structured data is implemented correctly.

    8. Focus on Mobile Optimization

    With the majority of users shopping from mobile devices, ensuring your WooCommerce store is mobile-friendly is essential for both SEO and user experience.

    How to Optimize for Mobile:

    • Responsive Theme: Make sure you’re using a WooCommerce theme that is fully responsive and mobile-optimized.
    • Use Google’s Mobile-Friendly Test: Run your site through Google’s Mobile-Friendly Test to see how well it performs on mobile.
    • Optimize for Mobile Speed: Use AMP (Accelerated Mobile Pages) plugins like AMP for WooCommerce to speed up your mobile site.

    9. Build High-Quality Backlinks

    Backlinks (links from other websites to yours) remain a key ranking factor for Google. Building high-quality backlinks can help increase your domain authority and improve your SEO.

    How to Build Backlinks for Your WooCommerce Store:

    • Guest Blogging: Write guest posts on relevant blogs in your niche that link back to your WooCommerce store.
    • Partner with Influencers: Collaborate with bloggers or influencers in your industry who can promote your products and provide valuable backlinks.
    • Create Shareable Content: Produce high-quality, informative content such as product guides, infographics, or tutorials that people want to link to.

    10. Track and Monitor SEO Performance

    Lastly, to ensure your SEO efforts are paying off, it’s essential to track and monitor your WooCommerce store’s performance.

    Tools for Monitoring SEO:

    • Google Analytics: Track website traffic, user behavior, and conversions.
    • Google Search Console: Monitor search performance, index status, and SEO issues.
    • Yoast SEO Insights: Get insights into your WooCommerce SEO performance directly from the Yoast SEO plugin dashboard.

    Final Thoughts

    Optimizing your WooCommerce store for SEO is crucial for driving traffic, increasing visibility, and boosting sales. By following these steps—optimizing product pages, using the right plugins, improving site speed, and building backlinks—you can ensure your WooCommerce store is well-optimized for search engines and set up for long-term success.

    Invest in SEO today, and you’ll reap the benefits of higher rankings and more organic traffic tomorrow!

    Photo by Merakist on Unsplash

  • How to Set Up and Manage a WooCommerce Subscription-Based Store

    How to Set Up and Manage a WooCommerce Subscription-Based Store

    Subscription-based eCommerce is booming. Whether you’re offering physical products, digital content, or services, a subscription model provides recurring revenue and a loyal customer base. With WooCommerce, setting up a subscription-based store is relatively easy, thanks to its powerful ecosystem of extensions. This blog post will guide you through the steps to set up and manage a WooCommerce subscription store effectively, along with recommendations for essential plugins.


    1. Install WooCommerce and Basic Setup

    Before you dive into subscriptions, you’ll need WooCommerce installed and your store set up. Here’s a quick rundown of the steps:

    1. Install WooCommerce: Go to your WordPress dashboard, navigate to Plugins > Add New, and search for “WooCommerce.” Click Install Now and then Activate.
    2. Configure Store Settings: WooCommerce will prompt you to set up basic store settings, including currency, payment gateways (PayPal, Stripe, etc.), and shipping preferences.
    3. Add Products: Once your store is configured, add your products by going to Products > Add New. Here, you can define your product details such as description, price, images, and categories.

    2. Install WooCommerce Subscriptions Plugin

    To enable subscription functionality on your WooCommerce store, you’ll need the WooCommerce Subscriptions plugin. This plugin provides all the tools you need to offer products and services on a recurring basis.

    How to Install WooCommerce Subscriptions:

    1. Purchase the Plugin: Visit the official WooCommerce marketplace and purchase the WooCommerce Subscriptions plugin.
    2. Upload and Activate: After purchasing, download the plugin’s zip file, go to Plugins > Add New, click Upload Plugin, and select the downloaded file. Install and activate it.
    3. Configure Subscription Settings: After activating, you’ll see new options under WooCommerce > Subscriptions in your WordPress dashboard. Here, you can customize settings like billing intervals, trial periods, renewal emails, and more.

    3. Create Subscription Products

    With WooCommerce Subscriptions installed, you can now create subscription products. Here’s how:

    1. Create a New Product: Go to Products > Add New.
    2. Select Product Type: Under the “Product Data” section, select Simple Subscription or Variable Subscription, depending on whether you’re offering one type of subscription or multiple tiers.
    3. Set Subscription Details: Define the subscription pricing, billing interval (weekly, monthly, annually, etc.), sign-up fee (if any), and optional free trial.
    4. Publish Your Product: Once you’ve entered all the necessary information, click Publish. Your subscription product is now live!

    4. Offer Multiple Subscription Plans

    If you want to provide different subscription tiers, such as Basic, Premium, and VIP, the WooCommerce Memberships plugin is an excellent addition. It allows you to create various membership levels, each with its own pricing and perks. This is especially useful if you want to offer exclusive content or products to different membership levels.

    How to Set Up Multiple Subscription Tiers:

    1. Install WooCommerce Memberships: Purchase and install the plugin from the WooCommerce marketplace.
    2. Create Membership Levels: Once installed, go to Memberships > Add New and create different membership tiers. You can assign different benefits and pricing models to each level.
    3. Link to Subscription Products: When creating a subscription product, you can now associate it with a specific membership tier, allowing customers to choose between different subscription levels.

    5. Automate Payments with Stripe or PayPal

    One of the main challenges of managing a subscription-based store is handling recurring payments. WooCommerce integrates seamlessly with payment gateways like Stripe and PayPal, allowing you to automate subscription renewals.

    Here’s how to set it up:

    1. Install Stripe/PayPal Payment Gateway Plugin: Head over to the WooCommerce marketplace and download the Stripe or PayPal plugin, depending on your preferred payment method.
    2. Configure Payment Settings: After activation, navigate to WooCommerce > Settings > Payments, and configure the gateway settings. For Stripe, you’ll need API keys, and for PayPal, you’ll need to connect your account.
    3. Enable Automatic Renewals: Once set up, WooCommerce Subscriptions will automatically handle recurring payments, so you don’t have to manually invoice customers each time their subscription renews.

    6. Manage Subscriptions and Customers

    As your subscription business grows, managing subscribers and their payment cycles becomes crucial. WooCommerce Subscriptions provides a detailed overview of each subscriber and their status, including payment history, renewal dates, and account management features.

    Managing Subscribers:

    1. Access Subscription Details: To view all subscriptions, go to WooCommerce > Subscriptions. Here you can see an overview of active, canceled, and expired subscriptions.
    2. Manual Changes: You can manually modify subscriptions if necessary, such as upgrading a plan, changing billing dates, or extending free trials.
    3. Renewal Notifications: WooCommerce Subscriptions automatically sends out renewal emails, but you can customize these notifications by going to WooCommerce > Settings > Emails.

    7. Additional Plugins to Enhance Your Subscription Store

    To manage your subscription-based WooCommerce store effectively, here are a few additional plugins that can enhance functionality:


    8. Monitor and Scale Your Subscription Store

    Running a successful subscription-based WooCommerce store requires ongoing management and optimization. Make sure to:

    • Monitor Churn Rate: Keep track of how many customers cancel their subscriptions, and analyze feedback to improve retention.
    • Offer Exclusive Perks: Keep subscribers engaged by offering exclusive discounts, early access to products, or members-only content.
    • Optimize User Experience: Regularly test and optimize your store’s UX, ensuring that the subscription signup process is simple and intuitive across all devices.

    Final Thoughts

    A WooCommerce subscription-based store can provide a steady stream of revenue while building a loyal customer base. By leveraging essential plugins like WooCommerce Subscriptions, WooCommerce Memberships, and automated payment gateways like Stripe and PayPal, you can set up and manage your subscription store with ease. With the right tools, you can focus on growing your subscriber base and offering valuable products and services that keep customers coming back.


    Feel free to explore these powerful plugins and watch your WooCommerce subscription store thrive!

  • Top WooCommerce Design Trends for 2024: Elevate Your Store’s User Experience

    Top WooCommerce Design Trends for 2024: Elevate Your Store’s User Experience

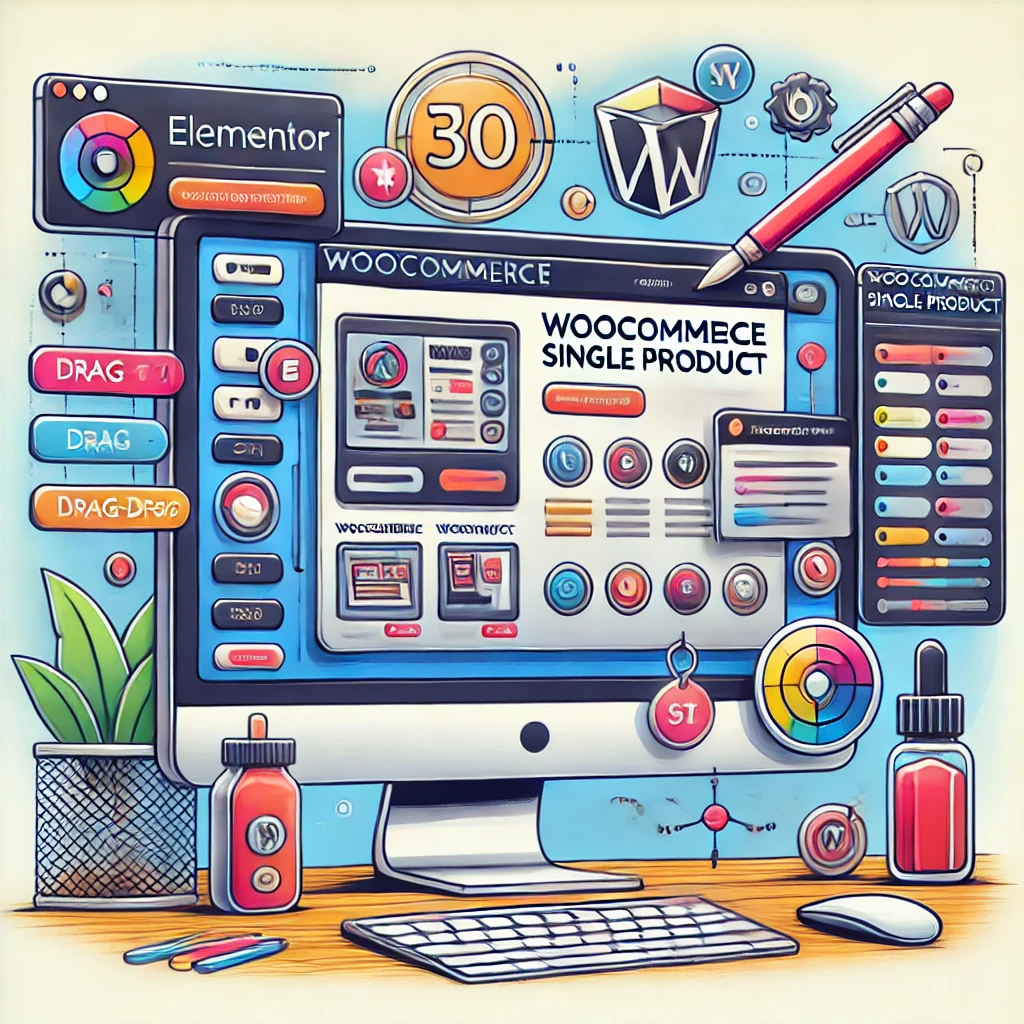
    As the world of eCommerce continues to evolve, so do the design trends that shape the look, feel, and functionality of online stores. WooCommerce, as one of the most popular eCommerce platforms, offers endless customization options for store owners. Staying on top of design trends is crucial not only to keep your store visually appealing but also to ensure that it’s user-friendly, optimized for conversions, and future-proof. Let’s explore the top WooCommerce design trends for 2024 that will help you elevate your store’s user experience.

    1. Minimalist Design with Bold Typography

    Minimalism remains a major trend in web design, and this holds true for WooCommerce stores. Clean, uncluttered layouts focus attention on key elements, like products and calls-to-action (CTAs). Paired with bold typography, minimalist designs allow your product imagery and content to shine. In 2024, expect to see even more stores embracing white space, clear fonts, and simple color schemes that enhance readability and navigation.

    Why it works: Minimalist design ensures fast loading times, reduces distractions, and directs users toward conversion paths, making the shopping experience seamless and enjoyable.

    2. Personalized Shopping Experiences with AI and Machine Learning

    Personalization is no longer a luxury—it’s an expectation. In 2024, AI and machine learning will play an even larger role in delivering personalized shopping experiences in WooCommerce stores. These technologies can analyze customer behavior, preferences, and past purchases to suggest products tailored to individual shoppers. Personalized product recommendations, dynamic content, and targeted promotions are becoming must-haves for a successful WooCommerce store.

    Why it works: Personalization boosts user engagement and increases the likelihood of purchases by showing customers the products they’re most interested in, enhancing overall user satisfaction.

    3. Micro-Interactions for Enhanced User Engagement

    Micro-interactions are subtle animations or feedback cues that respond to user actions. These can include things like a button changing color when hovered over or a small animation when an item is added to the cart. In 2024, more WooCommerce stores will implement micro-interactions to make the shopping experience more interactive and engaging. These little touches add personality and make navigating the site feel smoother and more intuitive.

    Why it works: Micro-interactions enhance the user experience by providing immediate feedback, making the interface feel responsive, and adding a layer of delight to the user’s journey.

    4. Immersive Product Pages with 3D Visualization and Augmented Reality (AR)

    As technology advances, customers increasingly expect more immersive online shopping experiences. In 2024, 3D product visualizations and AR features will become standard for WooCommerce stores, especially in industries like fashion, furniture, and home decor. Customers can view products in 3D, rotate them, and, in some cases, use AR to visualize how they would look in real life—such as trying on clothes virtually or seeing how furniture fits in their space.

    Why it works: 3D and AR technologies help customers make informed decisions, reduce returns, and enhance the overall shopping experience by providing a more tangible feel to online products.

    5. Mobile-First Design for a Seamless Mobile Experience

    With the rise of mobile commerce, mobile-first design continues to be a critical focus for WooCommerce store owners. In 2024, expect more WooCommerce themes and designs to be built with a mobile-first approach, ensuring that stores are fully optimized for smaller screens. This means intuitive navigation, fast-loading pages, and touch-friendly interactions designed specifically for mobile users.

    Why it works: With over half of online shoppers using mobile devices, providing a seamless mobile experience is essential for capturing sales and reducing bounce rates. Mobile-first design caters to modern shopping habits and improves accessibility.

    6. Dark Mode for Enhanced Visual Appeal and Accessibility

    Dark mode has been growing in popularity across websites and apps, and this trend is making its way into WooCommerce designs in 2024. Dark mode not only offers a sleek and modern look, but it’s also easier on the eyes, especially for users who shop at night or in low-light environments. Offering both light and dark modes for users to choose from adds an extra layer of customization and enhances the user experience.

    Why it works: Dark mode improves readability for some users, reduces eye strain, and provides a stylish, high-contrast interface that can appeal to a wide range of customers.

    7. Voice Search Optimization

    As voice search becomes more common, WooCommerce stores need to adapt to this trend in 2024. Optimizing your WooCommerce store for voice search involves adjusting your content to answer common questions in conversational language, improving page load times, and ensuring your site structure is easily navigable by voice assistants.

    Why it works: Voice search continues to rise in popularity, and optimizing for it can help you capture more organic traffic, particularly from mobile users who prefer hands-free shopping experiences.

    8. Storytelling Through Visuals and Video

    Incorporating storytelling into your WooCommerce design is a powerful way to connect with your audience on a deeper level. In 2024, more stores will use high-quality visuals, product videos, and behind-the-scenes content to tell their brand story. Whether it’s showing how products are made, sharing customer testimonials, or providing lifestyle imagery, visual storytelling helps humanize your brand and build stronger customer relationships.

    Why it works: Storytelling through visuals and videos creates emotional connections, increases trust, and helps communicate the value of your products more effectively than text alone.


    Final Thoughts

    Design trends for WooCommerce in 2024 focus on providing users with a seamless, interactive, and personalized shopping experience. By incorporating minimalist design, AI-driven personalization, immersive product pages, and mobile-first strategies, you can ensure your WooCommerce store stays ahead of the curve and continues to attract and engage customers. Whether you’re building a new store or refreshing an existing one, these design trends can help you create an online shopping experience that delights users and drives conversions.

    Photo by Kelly Sikkema on Unsplash

  • How to Delete WooCommerce Customers Who Have Never Made a Purchase

    How to Delete WooCommerce Customers Who Have Never Made a Purchase

    As your WooCommerce store grows, you may accumulate a significant number of registered users who have never made a purchase. These inactive accounts can clutter your customer database, making it harder to manage and potentially slowing down your site. In this blog post, we’ll explore why you might want to delete these inactive accounts and provide a simple PHP code snippet to help you do so safely.


    Why Delete Inactive WooCommerce Customers?

    1. Database Performance: A large number of inactive users can bloat your database, leading to slower query performance and longer backup times. Deleting these accounts can help optimize your database and improve overall site performance.
    2. Data Accuracy: Keeping your customer data clean and relevant is essential for effective marketing and customer relationship management. Removing inactive users helps you focus on customers who are actively engaged with your store.
    3. Security Concerns: Every user account represents a potential security risk. By minimizing the number of accounts in your database, you reduce the attack surface available to hackers.
    4. Cost Management: If you’re using CRM or email marketing tools that charge based on the number of contacts, deleting inactive users can help reduce unnecessary costs.

    How to Identify and Delete Inactive WooCommerce Customers

    Before proceeding with deletion, it’s important to back up your database. Once you have a backup, you can safely use the following code snippet to identify and delete users who have registered but never made a purchase.

    Step 1: Add the PHP Code Snippet

    Here’s a PHP code snippet that you can use to delete WooCommerce customers who have never made a purchase:

    function delete_customers_without_purchases() {
        global $wpdb;
    
        // Get all users with the customer role who have never made a purchase
        $customers = $wpdb->get_results("
            SELECT u.ID, u.user_login, u.user_email
            FROM {$wpdb->prefix}users u
            LEFT JOIN {$wpdb->prefix}usermeta um ON u.ID = um.user_id
            LEFT JOIN {$wpdb->prefix}wc_order_stats os ON u.ID = os.customer_id
            WHERE um.meta_key = '{$wpdb->prefix}capabilities'
            AND um.meta_value LIKE '%customer%'
            AND os.customer_id IS NULL
        ");
    
        if (!empty($customers)) {
            echo '<h2>Deleting Customers Who Have Never Made a Purchase</h2>';
            echo '<ul>';
    
            // Loop through each customer and delete their account
            foreach ($customers as $customer) {
                wp_delete_user($customer->ID);
                echo '<li>Deleted user: ' . esc_html($customer->user_login) . ' (' . esc_html($customer->user_email) . ')</li>';
            }
    
            echo '</ul>';
        } else {
            echo '<p>No customers found who have never made a purchase.</p>';
        }
    }
    
    // Usage example: Call this function to delete customers
    add_action('admin_init', 'delete_customers_without_purchases');

    Step 2: Implement the Code

    1. Using a Custom Plugin: You can create a small custom plugin to hold this code. To do this, create a folder named delete-inactive-customers in the wp-content/plugins/ directory. Inside that folder, create a file named delete-inactive-customers.php and paste the code snippet above into it. Then, activate the plugin from your WordPress dashboard.
    2. Adding to Theme’s functions.php: Alternatively, you can paste the code into your theme’s functions.php file. However, using a custom plugin is preferable as it won’t be affected when you update your theme.

    Step 3: Execute the Code

    The code is designed to run automatically when you access the WordPress admin area. It will scan for WooCommerce customers who have never made a purchase and delete their accounts.

    You can also remove the add_action('admin_init', 'delete_customers_without_purchases'); line and call the function manually if you prefer to run it only on demand.

    Step 4: Verify Deletion

    After running the code, you should verify that the inactive users have been deleted. You can check your user list in WooCommerce or by reviewing your database directly.

    Step 5: Disable the Code

    Once the code has executed and the inactive users have been deleted, it’s important to disable or remove the code to prevent accidental deletion in the future. If you added the code to a custom plugin, simply deactivate the plugin. If you placed it in your theme’s functions.php, you can comment it out or delete it.


    Conclusion

    Cleaning up your WooCommerce customer database by removing users who have never made a purchase is a practical step towards optimizing your store’s performance, enhancing security, and maintaining accurate data. The code snippet provided in this post offers a straightforward way to identify and delete these inactive accounts.

    Before implementing any deletion process, always ensure you have a recent backup of your database. This allows you to restore any data if needed. Once the inactive users are removed, you’ll have a more streamlined and manageable WooCommerce store.

    Feel free to share this post with other WooCommerce store owners, and if you have any questions or need further customization, leave a comment below!

    Photo by Markus Spiske on Unsplash

  • Why I Migrated From Jetpack Stats To Koko Analytics

    Why I Migrated From Jetpack Stats To Koko Analytics

    For years I have been using the Jetpack plugin for their lightweight stats feature. It’s a great little tool it gives me an overview of site traffic at a glance.

    For detailed analytics I use Google analytics, but I still like to have a feel of site visitors and pagee views at a glance.

    Jetpack stats was great for that. The stats plugin used to be a separate plguin then it was merged into Jetpack.

    Years back I must have created a non-commercial license for jetpack (I have no memory of this) and I’ve been using the stats on that license.

    A few weeks back I got an alert that they recognise I’m using a non-commercial license on a commercial site, fair enough, I can’t argue with that, I’m only using Jetpack for the stats and I can’t justify the price of more than £80 per year for a few stats, so I went looking for a replacement.

    Enter Koko Analytics a freemium plugin that does exactly what I need at no cost.

    Video

    Here’s a quick video tour of the Koko plugin so you can see it in action.

    Wrap Up

    Bye Jetpack it’s you not me, we need to break up.

    I recommend Koko Analytics if you are in the same situation.

    If you need help with your WooCommerce store get in touch.

    Photo by Anja Bauermann on Unsplash

  • How I Use Elementor To Customise WooCommerce Single Product Pages

    How I Use Elementor To Customise WooCommerce Single Product Pages

    In this video I’ll show you how I use Elementor to customise WooCommerce single product pages.

    Elementor is a drag and drop design tool that allows me to customise posts, pages and other content types using drag and drop in a no-code manner. No code means you don’t need to be a developer to create great looking designs.

    Video

    Wrap Up

    If you need help customising your WooCommerce store, please get in touch.

  • How To Add Transients To A WooCommerce Query

    How To Add Transients To A WooCommerce Query

    In this video I’ll show you how to add transients to a WooCommerce query to improve performance.

    A transient is a way to persist WordPress and WooCommerce data to the database to avoid running heavy queries which can slow down your database and in turn cause performance issues on your WordPress site.

    We can create a transient with a lifetime of say 24 hours and out that rather than outputting the contents of a massivce query.

    In my previous post I created a code snippet to output number of products purchased this could be a very expensive query to run if there are hundreds of thousands of orders and a lot of products. I’ll expand on that code snippet to add a transient.

    Video

    Code

    function nm_display_product_purchase_count() {
        global $product;
    
        if ( ! is_a( $product, 'WC_Product' ) ) {
            return;
        }
    
        $product_id = $product->get_id();
        $transient_key = 'tot_product_purchase_count_' . $product_id;
        $order_count = get_transient( $transient_key );
    	
    	
    	echo "transient _key = ".$transient_key;
    
    	echo "order count = ".$order_count;
    
        if ( false === $order_count ) {
            $order_count = 0;
    		echo "run query";
            // Get all orders
            $args = array(
                'status' => array( 'wc-completed', 'wc-processing', 'wc-on-hold' ),
                'limit' => -1, // Retrieve all orders
            );
    
            $orders = wc_get_orders( $args );
    
            // Loop through orders and count product purchases
            foreach ( $orders as $order ) {
                foreach ( $order->get_items() as $item ) {
                    if ( $item->get_product_id() == $product_id ) {
                        $order_count += $item->get_quantity();
                    }
                }
            }
    
            // Set transient to cache the result for 20 hours (72000 seconds)
            set_transient( $transient_key, $order_count, 24 * HOUR_IN_SECONDS );
        }
    
        // Display the purchase count before the Add to Cart button
        echo '<p><strong>Purchased: ' . $order_count . ' times</strong></p>';
    }
    
    // Hook the custom function into the single product summary
    add_action( 'woocommerce_single_product_summary', 'nm_display_product_purchase_count', 25 );
    

    Wrap Up

    If you are having a performance issue on your WooCommerce store, get in touch I can help to speed things up.

    Photo by Marc Sendra Martorell on Unsplash

  • How to Record WooCommerce Events in Google Analytics

    How to Record WooCommerce Events in Google Analytics

    In the competitive world of e-commerce, understanding customer behaviour is essential for optimizing your WooCommerce store. Google Analytics is a powerful tool that helps you track and analyse user interactions on your site. Recording WooCommerce events in Google Analytics can provide insights into customer behaviour, helping you improve your store’s performance and drive more sales.

    In this blog post, we’ll walk you through the process of setting up Google Analytics to track WooCommerce events and highlight some plugins that can simplify the process.

    Why Track WooCommerce Events?

    Tracking WooCommerce events in Google Analytics allows you to:

    • Monitor product performance and sales.
    • Understand customer behavior and identify drop-off points in the sales funnel.
    • Measure the effectiveness of marketing campaigns.
    • Optimize the user experience based on data-driven insights.

    Setting Up Google Analytics for WooCommerce

    To start recording WooCommerce events in Google Analytics, follow these steps:

    Step 1: Create a Google Analytics Account

    If you don’t already have a Google Analytics account, you’ll need to create one. Visit Google Analytics and sign up using your Google account.

    Step 2: Set Up a Property and Get Tracking ID

    Once your account is set up, create a new property for your WooCommerce store. Google Analytics will provide you with a unique tracking ID (usually in the format UA-XXXXX-Y). You’ll need this ID to connect your WooCommerce store to Google Analytics.

    Step 3: Install a Google Analytics Plugin

    To simplify the process of integrating Google Analytics with WooCommerce, consider using a plugin. Here are a few popular options:

    1. MonsterInsights

    MonsterInsights is a user-friendly plugin that makes it easy to set up Google Analytics on your WooCommerce store. It offers a range of features, including enhanced e-commerce tracking, which allows you to track key events such as product views, add-to-cart actions, and purchases.

    2. WooCommerce Google Analytics Integration

    The WooCommerce Google Analytics Integration plugin is specifically designed for WooCommerce stores. It provides deep integration with Google Analytics, enabling you to track a variety of e-commerce events. This plugin also supports Universal Analytics and Google Analytics 4.

    3. Google Analytics Dashboard for WP (GADWP)

    The Google Analytics Dashboard for WP (GADWP) plugin offers a comprehensive solution for integrating Google Analytics with your WordPress site. It includes enhanced e-commerce tracking for WooCommerce, allowing you to monitor detailed metrics directly from your WordPress dashboard.

    Step 4: Configure Enhanced E-commerce Tracking

    Enhanced e-commerce tracking provides more detailed insights into your store’s performance. To enable this feature in Google Analytics:

    1. Go to the Admin section of your Google Analytics account.
    2. Under the Property column, click on E-commerce Settings.
    3. Toggle the Enable E-commerce and Enable Enhanced E-commerce Reporting options.

    Step 5: Verify Data Collection

    After setting up the plugin and configuring enhanced e-commerce tracking, it’s crucial to verify that data is being collected correctly. In Google Analytics, navigate to the Real-Time > Overview section to see if your website activity is being recorded. You can also check the Conversions > E-commerce section for detailed reports on product performance, sales, and other key metrics.

    Key WooCommerce Events to Track

    Here are some essential WooCommerce events you should track in Google Analytics:

    • Product Impressions: Number of times products are viewed on category or product listing pages.
    • Product Clicks: Number of times products are clicked on.
    • Add to Cart: Number of times products are added to the cart.
    • Remove from Cart: Number of times products are removed from the cart.
    • Product Detail Views: Number of views on individual product pages.
    • Checkout Initiation: Number of times the checkout process is started.
    • Transactions: Number of completed purchases.

    Conclusion

    Tracking WooCommerce events in Google Analytics is crucial for understanding your customers and optimizing your store’s performance. By following the steps outlined in this guide and using the recommended plugins, you can gain valuable insights into user behavior and make data-driven decisions to grow your business.

    For more detailed information on each plugin, visit their respective websites and explore their documentation. Start tracking today and unlock the full potential of your WooCommerce store!

    Useful Links

    Feel free to leave your questions and experiences in the comments below! Happy tracking!

  • The Simple Way To Add Apple & Google Pay To Your WooCommerce Store

    The Simple Way To Add Apple & Google Pay To Your WooCommerce Store

    Adding Apple pay or Google pay to your WooCommerce store is a great way to reduce checkout friction and cart abandonment.

    When a customer can checkout from your store with a finger print or face recognition rather than having to pull out their credit card, this express checkout method reduces friction, and friction on the checkout leads to cart abandonments.

    In this blog post I’ll show you a super simple way to add Both Apple Pay and Google pay to your checkout with an integration from Stripe.

    Video

    Wrap Up

    I told you it was super simple, no need to setup complex integrations with Apple or Google, stripe has done the heavy lifting for you.

    If you need help with the payment provider on your WooCommerce store get in touch.

  • HOW TO CREATE AN AFFILIATE STORE USING WOOCOMMERCE

    HOW TO CREATE AN AFFILIATE STORE USING WOOCOMMERCE

    In this video I’ll show you how to use WooCommerce external/affiliate product to help create an affiliate store and organise your recommended products.

    I’m busy building a recommended product services and product pages and I’m using a WooCommerce feature to organise my recommendations.

    If you don’t know what an affiliate collaboration is, it’s when an agreement is made between you and a company selling a product or service. You send your traffic to that site and if a sale is made you get a commission.

    The technical details are that a cookie is set when a person hits that site with your unique ID set and the affiliated company recognises the traffic was sent from you when a sale is made and a commission applied.

    Here are some links I show in the video

    Links

    Here are the links I show in the video.

    Gravity forms affiliate page

    WooCommerce shortcode

    Video

    Wrap Up

    WooCommerce is not just to sell your own products and services, you can use it to link to other peoples stuff via an external/affiliate product.

    You can mix and match your product to be your own and external products.

    If you need help building your WooCommerce store, please get in touch.

  • What is a WordPress Nonce?

    What is a WordPress Nonce?

    Introduction

    A WordPress nonce is a ‘number used once’ to help protect URLs and forms from certain types of misuse, malicious or otherwise. It’s a security feature that WordPress provides to help you ensure that specific actions in your application are initiated by legitimate users, not by unauthorized scripts, bots, or other potential threats. In this blog post, we will explore the concept of WordPress nonce and how it can be used to secure your WordPress site.

    Understanding Nonce Concept

    In the world of computing, a nonce is a unique number that is used only once. It’s often employed as a security measure to safeguard digital communications. In WordPress, a nonce is created by a mathematical formula that concatenates the action, user ID, timestamp, and a unique key. The result is then hashed to produce a seemingly random string of numbers and letters, which forms the nonce that is appended to forms and URLs.

    Why WordPress Uses Nonces

    WordPress nonces are used as a security measure to ensure that certain actions are taken by legitimate users, not automated scripts. In a WordPress context, any time a user performs an action, like submitting a form or modifying a setting, WordPress can create a nonce and attach it to that action. When that action is later processed, WordPress can check the nonce to verify that the action was legitimate and not interference by an unauthorized third party.

    Using Nonces in WordPress

    Nonces in WordPress can be created and verified using built-in functions. Every time an action is performed that needs verification, a nonce is created using the wp_create_nonce() function. This nonce is then added to the form or URL being protected. When the form is submitted, or the URL accessed, WordPress checks the nonce using the wp_verify_nonce() function, to verify the action as legitimate.

    Security Implications of Nonces

    Nonces present a powerful layer of security for WordPress sites, protecting them against attacks where an attacker might trick a user’s browser into making an unwanted request, also known as a Cross-Site Request Forgery (CSRF) attack. By verifying nonce, WordPress can prevent a malicious user from tricking a victim to perform unwanted actions.

    Nonces and Authentication

    It’s important to note that nonces are not the same as passwords. They don’t prove the user’s identity, but merely that a certain action was performed by whoever was logged in at the time. Nonces are a temporary, single-use key linked to a specific action, user, and time frame, thereby adding an additional layer of safety.

    Limitations of Nonces

    However, there are limitations. Nonces in WordPress are not absolutely unique, and they have a lifespan, typically 24 hours by default. Also, a major limitation is that while a nonce is intended to be used only once, WordPress does not keep track of whether a nonce has been used, due to high potential overhead.

    Conclusion

    WordPress nonces are a key security feature, providing an important line of defence against certain types of attacks. Their proper use adds considerable security to forms and URLs within your WordPress site. By implementing WordPress nonces, you are taking a crucial step towards protecting your site from unauthorized or potentially harmful third-party interference.