Neil Matthews

Blog

  • The Ultimate Guide to WooCommerce Payment Gateways

    The Ultimate Guide to WooCommerce Payment Gateways

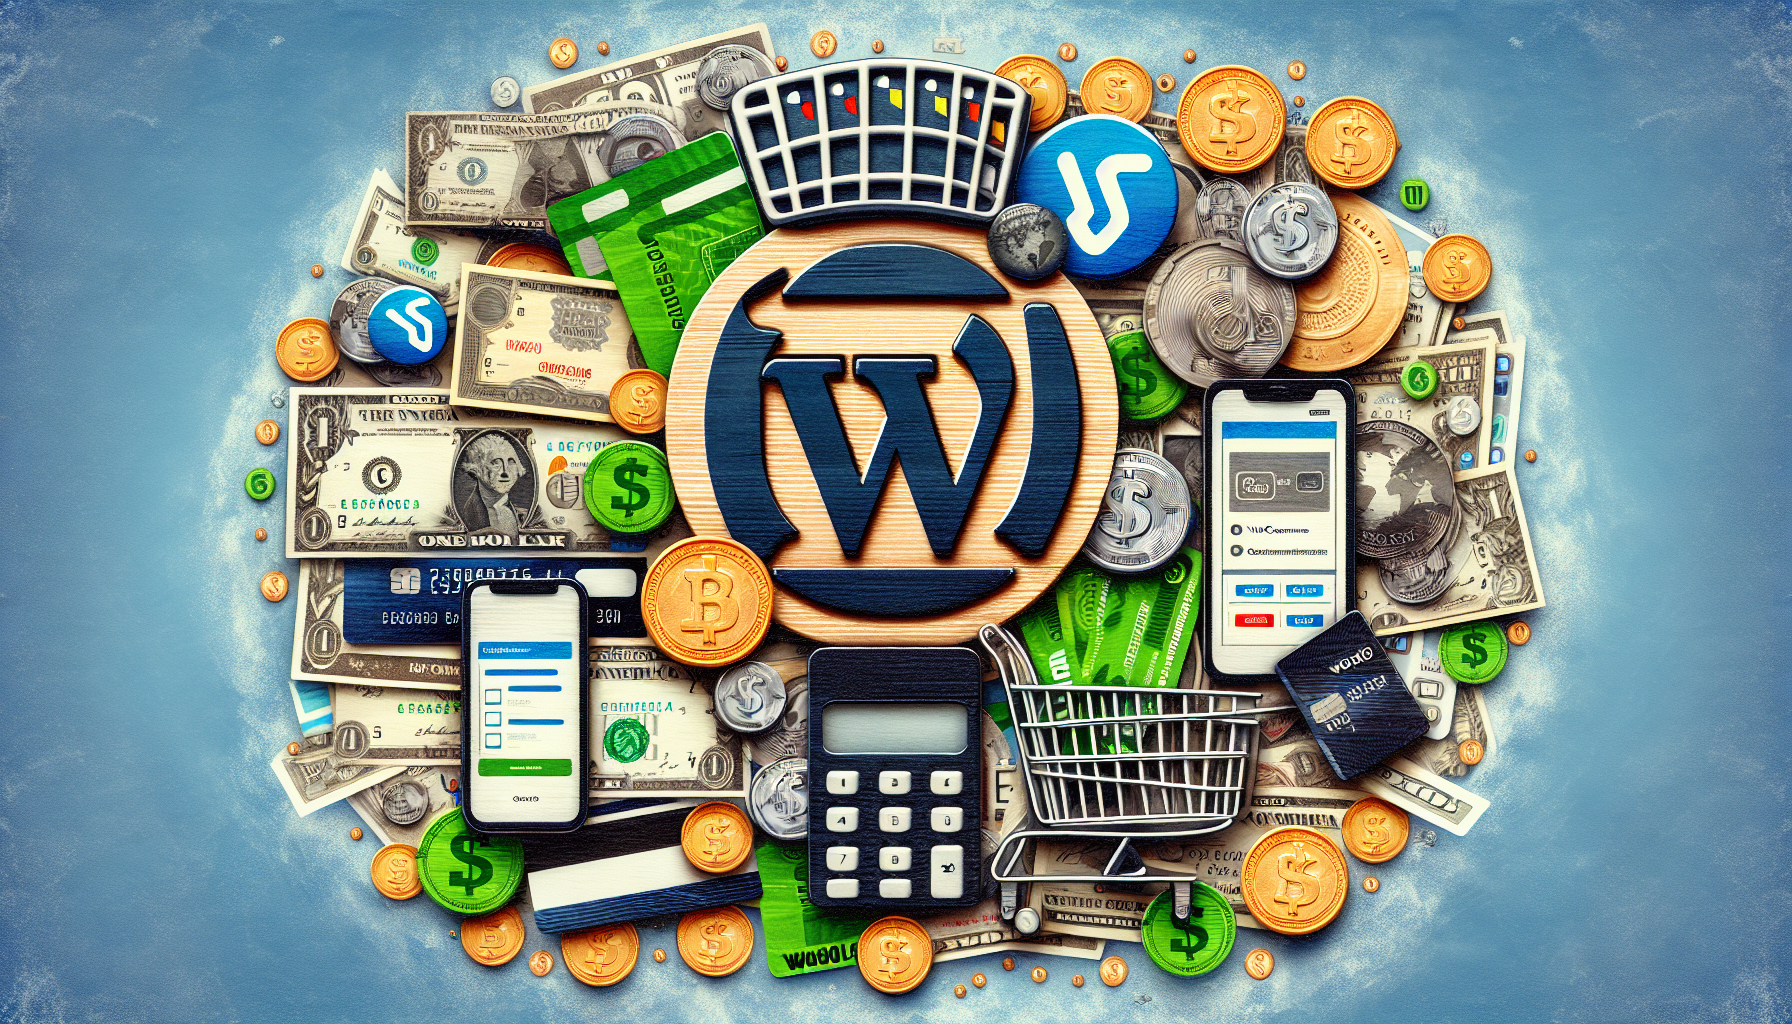
    Setting up a seamless payment process is crucial for the success of any online store. In this guide, we will explore the essentials of WooCommerce payment gateways, helping you choose the right option for your business.

    What is a Payment Gateway?

    A payment gateway is a service that authorizes credit card payments and other forms of electronic payments for ecommerce transactions. It acts as an intermediary between your store and the financial institutions, ensuring a secure and smooth transaction process.

    Popular WooCommerce Payment Gateways

    1. PayPal

    PayPal is one of the most widely used payment gateways, known for its reliability and ease of use. It supports multiple currencies and offers flexible payment options, including credit card payments, which can boost conversion rates.

    2. Stripe

    Stripe is a powerful gateway that offers advanced features such as subscription billing, and it’s highly customizable. It can handle everything from simple card payments to complex transaction routes and is highly regarded for its developer-friendly platform.

    3. Square

    Square offers a comprehensive suite of services ranging from payment processing to inventory management. It is especially beneficial for businesses that also operate a physical store, due to its streamlined in-person payment capabilities.

    4. Authorize.Net

    This payment gateway is praised for its robust fraud protection and extensive reporting features. It is tailored for larger businesses that require more detailed analytics and a high level of security.

    5. Amazon Pay

    Amazon Pay allows customers to use their Amazon accounts for checkout, making the process quick and convenient. This can be particularly advantageous in increasing customer trust and speeding up the purchase process.

    Factors to Consider When Choosing a Gateway

    Here are some important aspects to consider:

    • Transaction Fees: Evaluate the cost per transaction and ensure it aligns with your profit margins.
    • Security Features: SSL certificates, PCI compliance, and fraud detection are must-have features.
    • Compatibility: Check if the payment gateway integrates smoothly with your existing WooCommerce setup.
    • Customer Experience: A smooth checkout process enhances customer satisfaction and reduces cart abandonment rates.

    Conclusion

    Choosing the right payment gateway is a critical decision that impacts your store’s performance and customer satisfaction. By understanding the features and benefits of different WooCommerce payment gateways, you can select a solution that best suits your business needs, ultimately driving growth and success.

  • A Deep Dive Into The Automation I Create For 6 Months Of Content

    A Deep Dive Into The Automation I Create For 6 Months Of Content

    Welcome to an exclusive deep dive into the world of content automation! In this video, I unravel the strategies and tools I’ve employed to streamline the creation process for six months’ worth of content. If you’re a content creator, marketer, or business owner looking to optimize your workflow, this is a must-watch.

    Content creation can be overwhelming, especially when trying to consistently produce high-quality work. The good news? Automation can be your game-changer. In this video, I break down the step-by-step approach I use to pre-plan, produce, and schedule content, ensuring that your calendar is always full without burning out.

    You’ll discover how to leverage technology to automate repetitive tasks and how to tailor your content strategy to align with your long-term objectives. I share insights on the tools and platforms that have transformed the way I work, and how they can significantly cut down on the time and effort required.

    Moreover, I delve into the creative process, showing you how to maintain originality and engagement while utilizing automation. It’s all about finding the perfect balance between authentic storytelling and efficient time management.

    Whether you’re a beginner or experienced in the content world, this video offers practical tips and techniques that anyone can implement. It’s time to take your content game to the next level—saving time and resources in the process.

    Don’t miss out on this opportunity to elevate your content strategy with automation. Click the video below to get started on your journey to a more productive and organized content creation process.

  • How to Create a Killer Product Page in WooCommerce

    How to Create a Killer Product Page in WooCommerce

    Understand Your Audience

    Before diving into the design, spend time understanding who your audience is. What are their pain points, needs, and preferences? Use this information to tailor your product page to resonate with your target market.

    Compelling Product Descriptions

    Your description should highlight the benefits and unique features of the product. Use persuasive language to create a sense of urgency and address potential customer concerns. Incorporating keywords naturally can also improve SEO.

    High-Quality Images

    Visual representation is critical in eCommerce. Use high-resolution images from multiple angles. Consider adding a zoom feature to let customers view product details more closely. Including videos can also enhance engagement.

    Clear Call to Action

    Your “Add to Cart” button should be prominent and intuitive. Use contrasting colors to make it stand out and ensure that the action to buy is straightforward. Consider using encouraging language like “Buy Now” or “Get Yours Today!”

    Customer Reviews and Testimonials

    Displaying reviews builds trust and provides social proof. Ensure your review system is easily accessible and visible. Consider highlighting top-rated reviews or organizing them by relevance.

    Pricing Information

    Ensure your pricing is clear and transparent. If there are discounts or offers, make them noticeable. Display any related costs upfront to avoid surprises during checkout.

    Mobile Optimization

    With more people shopping on their phones, ensure your product page is mobile-friendly. This includes fast load times, easy navigation, and a responsive design that adapts to various screen sizes.

    Use Breadcrumbs

    Implement breadcrumbs on your product pages to enhance user navigation. This subtle feature aids user experience by showing their location in your store while linking them back to previous categories.

    Related Products and Upsells

    Showcase related products or suggest upsells to encourage further exploration. Doing so can increase the average order value and provide additional options for the customer.

    Trust Seals and Guarantees

    To boost credibility, include trust badges and express guarantees like “Money Back Promise” or “Secure Checkout”. These elements can reassure potential buyers about the safety and reliability of their purchase.

    In conclusion, a killer product page in WooCommerce is about focusing on the needs of your customers and optimizing their journey. By employing these strategies, you can create an engaging and persuasive product page that boosts conversions.

  • WooCommerce vs. Shopify: Which Is Right for You?

    WooCommerce vs. Shopify: Which Is Right for You?

    When it comes to launching an online store, choosing the right platform is crucial. With numerous options available, WooCommerce and Shopify remain two of the most popular choices. Each platform offers unique benefits and caters to different business needs. Let’s explore how they compare to help you decide which is right for you.

    Ease of Use

    WooCommerce: WooCommerce is a powerful WordPress plugin, making it highly customizable but potentially complex for beginners. It requires some familiarity with WordPress, and setup might involve more steps, particularly in terms of hosting and domain registration.

    Shopify: Shopify scores high on ease of use, offering a simple, intuitive interface with quick setup. It’s a fully hosted platform, so you don’t need to worry about web hosting or technical setup, making it ideal for newcomers.

    Customization and Flexibility

    WooCommerce: As an open-source solution, WooCommerce offers extensive customization options and flexibility. Users can choose from a variety of themes and plugins to tailor their store to specific needs. However, extensive customization may require coding skills or hiring a developer.

    Shopify: Shopify offers a range of themes and apps to customize your store, though it might not be as flexible as WooCommerce. Changes are typically user-friendly but may be limited by the app ecosystem.

    Cost

    WooCommerce: Being open source, WooCommerce is free to use. However, expect costs for hosting, domain registration, premium themes, and additional plugins. These can add up but offer a scalable solution where you can start cheap and gradually increase your budget as you grow.

    Shopify: Shopify offers several pricing tiers, starting from a basic plan with all essential features included. While it can be more expensive than WooCommerce, all hosting and security costs are built into the subscription fee, offering predictability in costs.

    SEO Capabilities

    WooCommerce: Built on WordPress, WooCommerce provides robust SEO features. Users benefit from WordPress plugins like Yoast SEO to optimize product pages and blog content, making it a strong contender for organic search traffic.

    Shopify: Shopify includes built-in SEO features and best practices. Although not as extensive as WooCommerce, it offers a solid framework for achieving good SEO results quickly.

    Support and Resources

    WooCommerce: Official support can be limited to documentation and forums, but a large community and numerous third-party developers offer solutions and assistance.

    Shopify: Shopify provides 24/7 customer support, along with comprehensive documentation and a community forum. This can be a lifesaver for users who prefer immediate assistance from the platform.

    Conclusion

    Your choice between WooCommerce and Shopify should be guided by your business model, technical expertise, and budget.

    If you prefer flexibility, deep customization, and you have some technical skills or access to a developer, WooCommerce might be your ideal choice. Conversely, if you seek a user-friendly interface with dependable customer support and packaged hosting, Shopify could be the better option.

    Ultimately, both platforms are equipped to build a successful online store, so consider trialing both to see which aligns best with your business needs.

  • How to Choose the Right Hosting for Your WooCommerce Store

    How to Choose the Right Hosting for Your WooCommerce Store

    Choosing the right hosting for your WooCommerce store is crucial for ensuring seamless performance, security, and scalability. Here are some key factors to consider when selecting a hosting provider:

    1. Understand Your Needs

    Begin by assessing your store’s requirements. Consider the expected traffic, product catalog size, and any additional resources needed for themes and plugins.

    2. Types of Hosting

    • Shared Hosting: If you’re just starting out and expect low traffic, shared hosting can be a cost-effective option. However, it might not provide the best performance for higher traffic demands.
    • VPS Hosting: Offers better performance and more control compared to shared hosting. Suitable for medium-sized stores.
    • Dedicated Hosting: Provides entire server resources for your store. Ideal for large WooCommerce sites with significant traffic.
    • Managed WordPress Hosting: Specifically optimized for WordPress and WooCommerce, offering seamless updates and enhanced security.

    3. Performance and Uptime

    Your hosting provider should guarantee high uptime and fast load times, which are essential for maintaining a good customer experience and SEO rankings. Look for providers with an uptime guarantee of 99.9% or higher.

    4. Security Features

    Ensure that your hosting includes robust security measures like SSL certificates, firewalls, daily backups, and malware scanning to protect your store and customer data.

    5. Scalability Options

    As your store grows, your hosting should be able to scale its resources. Opt for a provider that offers easy upgrade options as your traffic and needs increase.

    6. Customer Support

    A responsive and knowledgeable support team is vital for resolving any issues quickly. Check for hosting providers that offer 24/7 support with multiple contact options.

    7. Pricing

    While cost shouldn’t be the only factor, it’s important to find a hosting plan that offers a good balance of features and affordability. Consider the long-term costs and any additional fees for features or upgrades.

    Conclusion

    Taking the time to choose the right hosting provider for your WooCommerce store can significantly impact your store’s success. Evaluate your options based on your specific needs and long-term business goals to find the perfect fit.

    By following these guidelines, you’ll be well-equipped to make an informed decision and set your WooCommerce store up for success.

  • Top 5 Features Every WooCommerce Store Owner Should Know

    Top 5 Features Every WooCommerce Store Owner Should Know

    1. Product Management: WooCommerce offers extensive product management options, including easy inventory tracking, product variations, and digital/downloadable products. Store owners can list unlimited products and variants, enabling a flexible and comprehensive catalog.
    2. Customizable Storefront: With a plethora of themes and design tools, WooCommerce allows store owners to create a unique storefront. Custom CSS, various layout settings, and integration with page builders like Elementor provide almost limitless design possibilities.
    3. Secure Payments: WooCommerce comes with built-in support for major payment gateways such as PayPal, Stripe, and Square. With its extensibility, store owners can integrate with local and global payment providers, ensuring secure and versatile transaction handling.
    4. Extendable with Plugins: The ecosystem of WooCommerce plugins opens up an array of functionalities. From SEO optimization plugins to advanced analytics and marketing tools, these extensions empower store owners to enhance their store’s capabilities.
    5. Comprehensive Reporting: WooCommerce offers robust analytics and reporting capabilities. Detailed sales reports, customer statistics, and stock levels are accessible directly from the dashboard, providing valuable insights for informed decision-making.

    By leveraging these features, WooCommerce store owners can ensure a streamlined and effective eCommerce experience for both themselves and their customers. Whether it’s simplifying product management or enhancing the checkout process, these tools are key to running a successful online store.

  • Getting Started with WooCommerce: A Step-by-Step Guide

    Getting Started with WooCommerce: A Step-by-Step Guide

    WooCommerce is a powerful and flexible eCommerce plugin for WordPress that transforms your website into a fully-functional online store. Whether you’re selling physical products, digital goods, or services, WooCommerce provides the tools you need to succeed. In this guide, we’ll walk you through the initial setup to get your store up and running.

    Step 1: Install WooCommerce

    Begin by installing the WooCommerce plugin. Navigate to the Plugins section in your WordPress dashboard and click on Add New. Search for “WooCommerce,” and click Install Now. Once installed, activate the plugin.

    Step 2: Configure Store Details

    On activation, WooCommerce will launch a setup wizard to help you configure initial settings. Enter important details such as your store’s location, currency, and the types of products you plan to sell.

    Step 3: Choose a Payment Method

    WooCommerce supports several payment gateways. During the setup, you’ll have the opportunity to select and configure popular options like PayPal, Stripe, or direct bank transfer. Ensure that you choose a method that suits your business needs.

    Step 4: Set Up Shipping Options

    Configure your shipping options by defining shipping zones, rates, and methods. WooCommerce allows you to tailor shipping settings per region, ensuring that your customers have a clear understanding of shipping costs and services available to them.

    Step 5: Add Your Products

    It’s time to start stocking your store with products. Go to Products > Add New. Enter the product name, description, price, and any other relevant details. Don’t forget to upload high-quality images and categorize your products to make them easy for customers to find.

    Step 6: Customize Your Store Design

    WooCommerce is compatible with a wide range of WordPress themes. Choose a theme that offers both aesthetic appeal and functionality. Consider using a theme specifically designed for WooCommerce to ensure seamless integration and a professional look.

    Step 7: Install Essential Plugins

    Enhance your WooCommerce store by installing plugins that add functionality, such as SEO optimization tools, customer review systems, and inventory management solutions. Carefully select plugins to avoid overloading your site, which could affect performance.

    Conclusion

    Launching a WooCommerce store may seem daunting at first, but following these steps will help you lay a solid foundation for your eCommerce venture. With WooCommerce’s versatility and scalability, you can grow and adapt your store as your business needs evolve.

    Ready to start selling? Log in to your WordPress site and begin your WooCommerce journey today.

  • How I Created Six Months Of Content In A Morning With AI & Automation

    How I Created Six Months Of Content In A Morning With AI & Automation

    Ever feel like creating content for your website is a never-ending task? In my latest video, I share how I tackled this challenge head-on and managed to create six months’ worth of content for WP Dude in just one morning using AI and automation.

    The Power of AI Tools

    With advancements in AI, tools like ChatGPT and others have revolutionized the way we approach content creation. In this video, I walk you through my process of brainstorming, drafting, and refining content ideas with the help of AI. These tools not only accelerate the process but also ensure quality and variety in your content pipeline.

    Automation to Streamline Workflow

    Content creation isn’t just about writing—it’s about planning, scheduling, and optimizing for your audience. I integrated automation tools like scheduling platforms, keyword research tools, and task managers to streamline the process. By leveraging these technologies, I turned what used to be a multi-day task into a morning’s work.

    What You’ll Learn

    In the video, I cover:

    • How to use AI for idea generation and content creation.
    • Tools that help automate content scheduling and publishing.
    • Tips for maintaining a consistent tone and style across all content.

    This approach not only saves time but ensures a consistent flow of valuable content for your audience, whether you’re running a blog, managing social media, or both.

    Tools Used

    Automation – make.com

    Content creation – chatgpt.com

    Ready to Transform Your Workflow?

    If you’ve been struggling with content creation, this video will inspire you to rethink your strategy. With the right tools and mindset, you can simplify the process and focus on what truly matters—connecting with your audience.

    Check out the video above and start building your content empire today!

    Prompts

    CHAT GPT

    We are going to create a blog post, I’ll pass in the title of the blog post, I want you to return the text.

    Don’t be too verbose.

    Return as html that can be passed into the WordPress rest API,

    IMPORTANT do not include header or body information, only the content.

    IMPORTANT do not wrap with “`html ‘”

    DAL-E

    Create a feature image for a blog post, the image will be based upon the title of the blog post {{1.0}} IMPORTANT don’t include any text in the image

    Wrap Up

    What are your thoughts on the power of AI and Automation like this?

    Photo by Carl Heyerdahl on Unsplash

  • Using Discounts and Coupons Effectively in WooCommerce

    Using Discounts and Coupons Effectively in WooCommerce

    Discounts and coupons are powerful tools for boosting sales, attracting new customers, and encouraging repeat purchases in your WooCommerce store. When used strategically, they can help increase revenue without sacrificing profitability. In this post, we’ll explore how to create and use discounts and coupons effectively in WooCommerce.


    Why Discounts and Coupons Work

    Here are some of the key benefits of offering discounts and coupons in your WooCommerce store:

    • Increase Sales Volume: Discounts can encourage customers to purchase more items or larger quantities.
    • Attract New Customers: Coupons are an excellent way to incentivize first-time buyers.
    • Clear Inventory: Move slow-selling or excess inventory with attractive deals.
    • Encourage Repeat Purchases: Reward loyal customers with exclusive offers to keep them coming back.

    Types of Discounts and Coupons You Can Offer

    Here are popular types of discounts and coupons you can use in WooCommerce:

    1. Percentage Discounts
      Example: “Get 20% off your order.”
      • Great for encouraging larger purchases.
    2. Fixed Amount Discounts
      Example: “$10 off when you spend $50 or more.”
      • Useful for low-margin products or specific price thresholds.
    3. Buy One Get One Free (BOGO)
      Example: “Buy one, get one 50% off.”
      • Perfect for promoting complementary or overstocked items.
    4. Free Shipping Offers
      Example: “Free shipping on orders over $50.”
      • A proven way to reduce cart abandonment.
    5. Seasonal or Holiday Discounts
      Example: “Black Friday 30% off sale.”
      • Capitalize on high-traffic shopping periods.

    How to Create Coupons in WooCommerce

    Follow these steps to set up a coupon in WooCommerce:

    1. Enable Coupons:
      • Go to WooCommerce > Settings > General and check the box for Enable the use of coupon codes.
    2. Create a New Coupon:
      • Navigate to Marketing > Coupons (or WooCommerce > Coupons in older versions).
      • Click Add Coupon to create a new coupon code.
    3. Configure the Coupon:
      • Coupon Code: Enter a unique code (e.g., “SAVE20”).
      • Discount Type: Choose between a percentage discount, fixed cart discount, or fixed product discount.
      • Amount: Specify the discount amount.
      • Usage Restrictions: Set conditions such as minimum spend, maximum spend, or product/category restrictions.
      • Usage Limits: Limit how many times the coupon can be used (e.g., once per customer).
    4. Publish the Coupon:
      • Once configured, click Publish to make the coupon active.

    Tips for Using Discounts and Coupons Effectively

    To maximize the effectiveness of your discounts and coupons, keep these tips in mind:

    1. Create a Sense of Urgency

    • Use phrases like “Limited Time Offer” or “Ends Tonight” to motivate quick purchases.

    2. Personalize Coupons

    • Reward loyal customers with exclusive offers or send targeted discounts based on purchase history.

    3. Promote Strategically

    • Share your coupons via email, social media, or pop-ups on your site.
    • Add banners on your homepage to highlight active discounts.

    4. Combine Discounts with Upselling

    • Offer discounts on higher-value bundles or complementary products.

    5. Track Performance

    • Monitor the success of your coupons by checking WooCommerce analytics. Adjust your strategy based on what works best.

    Recommended WooCommerce Plugins for Discounts and Coupons

    Take your discount strategy to the next level with these plugins:

    1. Advanced Coupons for WooCommerce
      • Adds advanced features like loyalty programs, BOGO deals, and coupon scheduling.
    2. YITH WooCommerce Dynamic Pricing and Discounts
      • Create complex discount rules based on user roles, cart contents, or purchase history.
    3. WooCommerce Smart Coupons
      • Generate bulk coupons, gift cards, and store credit.
    4. Discount Rules for WooCommerce
      • Automate discounts for cart totals, specific products, or customer groups.

    Common Mistakes to Avoid

    • Overusing Discounts: Offering too many discounts can erode your profit margins and devalue your products.
    • Unclear Terms: Clearly communicate the rules for using your coupons to avoid customer confusion.
    • Neglecting Analytics: Failing to track coupon performance can lead to missed optimization opportunities.

    Final Thoughts

    Discounts and coupons, when used strategically, can be a game-changer for your WooCommerce store. They’re not just about lowering prices—they’re about delivering value to customers while boosting your sales and brand loyalty.

    Need more tips on growing your WooCommerce business? Check out our guide on How to Create a High-Converting Product Page in WooCommerce.

    Let us know in the comments how you’re using discounts and coupons in your store!


    Would you like help creating a promotional plan for your discounts? Let me know!

    Photo by Perry Merrity II on Unsplash

  • How to Add Customer Reviews to Boost WooCommerce Sales

    How to Add Customer Reviews to Boost WooCommerce Sales

    Customer reviews are a game-changer for any eCommerce store. They build trust, boost credibility, and can significantly increase sales by influencing purchasing decisions. In this guide, you’ll learn how to enable and optimize customer reviews in your WooCommerce store to maximize their impact.


    Why Customer Reviews Matter

    Here’s why customer reviews are essential for your WooCommerce store:

    • Build Trust: Honest reviews help potential buyers trust your brand and products.
    • Boost Conversions: Products with reviews are more likely to be purchased.
    • Improve SEO: Reviews generate unique, user-generated content, which can improve your search engine ranking.
    • Provide Feedback: Learn what customers love and where to improve.

    How to Enable Customer Reviews in WooCommerce

    By default, WooCommerce includes a feature to add product reviews. Here’s how to enable and configure them:

    1. Log in to Your WordPress Dashboard.
    2. Navigate to WooCommerce > Settings > Products.
    3. Scroll down to the General section and check the box next to Enable reviews.
    4. (Optional) Check Show “verified owner” label on customer reviews to display a label for customers who actually purchased the product.
    5. Click Save Changes.

    Now, customers can leave reviews on your product pages.


    How to Customize the Review Section

    To make reviews more effective, customize how they appear on your site:

    1. Go to Appearance > Customize > WooCommerce > Product Page.
    2. Adjust the layout and visibility of the review section.
    3. Use plugins like WooCommerce Product Reviews Pro for advanced features such as:
      • Adding photos and videos to reviews.
      • Filtering reviews by rating.
      • Allowing customers to vote reviews as helpful.

    Tips to Encourage More Reviews

    Getting customers to leave reviews can be challenging, but these strategies can help:

    1. Ask for Reviews:
      • Send an automated email after a purchase, asking customers to leave a review.
      • Include a direct link to the product’s review section.
    2. Offer Incentives:
      • Provide a discount code or entry into a giveaway for leaving a review.
    3. Make It Easy:
      • Keep the review process simple by minimizing the steps required.
    4. Respond to Reviews:
      • Show appreciation for positive reviews.
      • Address negative reviews politely and offer solutions.

    Using Plugins to Enhance Reviews

    Several WooCommerce plugins can enhance the functionality of your reviews:

    1. WooCommerce Product Reviews Pro
      • Add photos, videos, and custom fields to reviews.
      • Allow customers to upvote helpful reviews.
    2. Judge.me
      • Automate review requests.
      • Display reviews with rich snippets for better SEO.
    3. YITH WooCommerce Advanced Reviews
      • Create a modern review system with pros and cons.
      • Add a summary box for reviews.
    4. Trustpilot Reviews
      • Integrate third-party reviews from Trustpilot for social proof.

    Showcase Reviews Effectively

    To maximize the impact of reviews, display them strategically:

    • Highlight top reviews on the homepage or product pages.
    • Use widgets to showcase customer testimonials in sidebars or footers.
    • Display reviews with photos or videos to increase engagement.

    How Reviews Boost Sales

    Here’s how adding customer reviews can directly influence sales:

    1. Social Proof: Seeing others’ positive experiences builds trust and confidence.
    2. Overcoming Hesitations: Reviews address common questions or concerns about the product.
    3. SEO Benefits: Search engines favor fresh, user-generated content like reviews, driving more organic traffic.

    Final Thoughts

    Adding and optimizing customer reviews is one of the simplest yet most effective ways to boost WooCommerce sales. By enabling reviews, encouraging customer participation, and showcasing them effectively, you’ll see higher conversions and a stronger relationship with your audience.

    Ready to take your WooCommerce store to the next level? Check out our guide on How to Create a High-Converting Product Page in WooCommerce.

    Let us know in the comments how customer reviews have helped your store grow!


    Would you like assistance setting up review plugins or automating review requests? Let me know!

    Photo by Towfiqu barbhuiya on Unsplash

  • How to Create Product Bundles in WooCommerce to Increase Sales

    How to Create Product Bundles in WooCommerce to Increase Sales

    Product bundles are a powerful way to increase sales, improve customer satisfaction, and clear out inventory. By grouping complementary products together, you can encourage customers to purchase more items at once while offering them value. This guide will show you how to create product bundles in WooCommerce to grow your revenue.


    What Are Product Bundles?

    A product bundle is a group of products sold together as a package, often at a discounted price. For example:

    • A “Travel Essentials Bundle” that includes a backpack, water bottle, and travel pillow.
    • A “Tech Starter Pack” with a laptop, mouse, and keyboard.

    Bundles work well because they:

    • Encourage larger orders: Customers get more value for their money.
    • Clear inventory: Move less-popular products by bundling them with bestsellers.
    • Enhance customer experience: Offer ready-made solutions tailored to their needs.

    How to Create Product Bundles in WooCommerce

    WooCommerce doesn’t include product bundling functionality by default, but you can use plugins to add this feature. Here’s how to set up bundles step by step:


    Step 1: Install a Product Bundling Plugin

    The easiest way to create bundles is by using a WooCommerce plugin. Here are some popular options:

    1. WooCommerce Product Bundles
      • Feature-rich with options for discounts, customization, and flexible pricing.
    2. YITH WooCommerce Product Bundles
      • Simple to use and supports dynamic pricing.
    3. WP Configurator
      • Great for creating customizable bundles.

    Step 2: Configure the Plugin

    After installing and activating your chosen plugin:

    1. Go to WooCommerce > Settings and configure the plugin’s general settings.
    2. Follow the plugin’s documentation to enable bundling features on your store.

    Step 3: Create Your First Bundle

    1. Go to Products > Add New to create a new product.
    2. Set the product type to Bundle (specific options may vary depending on the plugin).
    3. Add products to the bundle by searching for existing products in your WooCommerce catalog.
    4. Customize the bundle:
      • Pricing: Set a fixed price or allow dynamic pricing based on the selected items.
      • Discounts: Offer a percentage or fixed discount for the bundle.
      • Visibility: Make the bundle visible on the shop page or only on related product pages.

    Step 4: Optimize Your Bundle for Sales

    To make your bundles more appealing:

    • Name your bundle creatively. For example, “Winter Survival Kit” or “Home Office Essentials.”
    • Highlight savings. Show how much customers save by purchasing the bundle versus individual items.
    • Use compelling visuals. Display high-quality images of the bundled products together.

    Tips for Successful Product Bundling

    1. Choose Complementary Products: Bundle items that make sense together (e.g., a camera with accessories).
    2. Offer a Discount: Discounts are a strong motivator for customers to buy bundles.
    3. Test Your Bundles: Experiment with different product combinations and pricing to see what performs best.
    4. Promote Your Bundles: Feature bundles on your homepage, product pages, and email campaigns.

    Examples of Product Bundle Ideas

    • Fitness Gear Bundle: Yoga mat, resistance bands, and a water bottle.
    • Gaming Starter Pack: Gaming mouse, keyboard, and headset.
    • Skincare Set: Cleanser, toner, and moisturizer.

    Why Product Bundles Work

    Product bundles benefit both you and your customers:

    • For You: Boost average order value, clear inventory, and attract more sales.
    • For Customers: Provide better value and convenience.

    Final Thoughts

    Creating product bundles in WooCommerce is a smart way to increase sales while offering value to your customers. By using the right plugins and strategies, you can craft irresistible bundles that help your store stand out.

    Ready to take your WooCommerce store to the next level? Check out our guide on How to Create a High-Converting Product Page in WooCommerce.

    Let us know in the comments how you’re using product bundles in your WooCommerce store!


    Would you like help creating a promotional campaign for your bundles? Let me know!

    Photo by Ahmadur Rahman on Unsplash

  • Top 5 Upselling and Cross-Selling Plugins for WooCommerce

    Top 5 Upselling and Cross-Selling Plugins for WooCommerce

    Upselling and cross-selling are proven strategies to boost sales and improve customer satisfaction in your WooCommerce store. These tactics help you introduce customers to related or upgraded products, increasing their overall order value. To make this process seamless, here are the top 5 WooCommerce plugins for upselling and cross-selling.


    1. WooCommerce Product Add-Ons

    Why It’s Great:
    WooCommerce Product Add-Ons allows you to offer customers additional options or upgrades when they add a product to their cart. This plugin is excellent for upselling complementary features, such as gift wrapping or extended warranties.

    Key Features:

    • Customizable add-ons for products.
    • Options for checkboxes, dropdowns, and text fields.
    • Easy setup with drag-and-drop functionality.

    Get WooCommerce Product Add-Ons


    2. Beeketing for WooCommerce

    Why It’s Great:
    Beeketing is an all-in-one marketing platform designed for WooCommerce. It includes powerful tools for upselling and cross-selling, such as personalized product recommendations and a sales pop feature.

    Key Features:

    • “Frequently Bought Together” product recommendations.
    • Upsell offers on checkout pages.
    • AI-powered personalization for better targeting.

    Get Beeketing for WooCommerce


    3. YITH WooCommerce Frequently Bought Together

    Why It’s Great:
    This plugin is inspired by Amazon’s famous “Frequently Bought Together” feature. It shows related products on a product page, encouraging customers to add them to their cart in one click.

    Key Features:

    • Customizable product bundles.
    • Dynamic pricing for bundles (e.g., discounts on grouped products).
    • Simple and intuitive interface.

    Get YITH WooCommerce Frequently Bought Together


    4. WooCommerce One Click Upsell Funnel

    Why It’s Great:
    This plugin lets you create upsell funnels that present customers with exclusive offers after they make a purchase. It’s ideal for post-purchase upselling, increasing average order values without interrupting the buying process.

    Key Features:

    • Post-purchase upsell offers.
    • Customizable funnel designs.
    • Integration with payment gateways like Stripe and PayPal.

    Get WooCommerce One Click Upsell Funnel


    5. CartFlows

    Why It’s Great:
    CartFlows is a comprehensive sales funnel builder for WooCommerce. It allows you to add upselling and cross-selling offers to your checkout flow seamlessly, helping you guide customers toward higher-value purchases.

    Key Features:

    • One-click upsell and downsell offers.
    • A/B testing for optimizing funnels.
    • Beautiful, customizable templates.

    Get CartFlows


    Why Upselling and Cross-Selling Are Essential

    • Increased Revenue: Offer customers valuable add-ons or upgrades to boost their spending.
    • Enhanced Customer Experience: Help customers discover related products that enhance their purchase.
    • Better Inventory Management: Promote slow-moving or complementary items.

    By using the right tools, you can automate these strategies and make the buying journey seamless for your customers.


    Final Thoughts

    Choosing the right upselling and cross-selling plugin can make a big difference in your WooCommerce store’s performance. Experiment with these plugins to find the best fit for your business needs.

    Need help implementing these tools? Check out our guide on How to Create a High-Converting Product Page in WooCommerce.

    Let us know in the comments which plugin works best for your store!


    Would you like help creating related posts or promotional materials? Let me know!