Neil Matthews

Blog

  • INTRODUCTION TO THE woOCOMMERCE REST api

    INTRODUCTION TO THE woOCOMMERCE REST api

    In this video I’ll give you an introduction to the WooCommerce REST API, what it is and what you can do with it.

    Video

    postman.com

    WooCommerce rest API Documentation

    Wrap Up – Introduction To The WooCommerce REST API

    The REST API is used for integrating

    If you need help with the WooCommerce REST API get in touch.

    Photo by Kate Stone Matheson on Unsplash

  • Unlocking the Power of WooCommerce Coupons: A Comprehensive Guide

    Unlocking the Power of WooCommerce Coupons: A Comprehensive Guide

    Introduction – Unlocking the Power of WooCommerce Coupons

    In the dynamic world of e-commerce, every tool and strategy you employ can make a significant impact on your business’s success. One such powerful tool at your disposal is WooCommerce coupons. These virtual discount codes, when used effectively, can drive sales, boost customer loyalty, and enhance the overall shopping experience on your WooCommerce store. In this comprehensive guide, we will explore the ins and outs of WooCommerce coupons, from creation to optimization, to help you unlock their full potential.

    Table of Contents:

    1. Introduction to WooCommerce Coupons

    • An overview of what WooCommerce coupons are, their significance in e-commerce, and their role in attracting and retaining customers.

    2. Types of WooCommerce Coupons

    • Explore the various coupon types you can create, including percentage discounts, fixed amount discounts, free shipping, buy one get one (BOGO), and more.

    3. Creating Coupons in WooCommerce

    • A step-by-step guide on how to create coupons within your WooCommerce dashboard, including coupon code generation, coupon options, and usage restrictions.

    4. Setting Up Coupon Expiry Dates

    • The importance of setting expiration dates for coupons and how to do it effectively to create a sense of urgency.

    5. Using Coupon Categories and Tags

    • Learn how to organize your coupons using categories and tags, making it easier to manage and target specific customer segments.

    6. Targeting Specific Customer Groups

    • Explore how to use coupon restrictions and user roles to deliver personalized offers to different customer groups.

    7. Advanced Coupon Strategies

    • Dive into advanced coupon strategies such as stacking coupons, limited-time flash sales, and coupon-based subscription incentives.

    8. WooCommerce Coupon Plugins

    • Discover WooCommerce plugins and extensions that can enhance your coupon capabilities, from social media coupon integration to loyalty programs.

    9. Best Practices for WooCommerce Coupons

    • In-depth dos and don’ts of using coupons in your WooCommerce store, including coupon naming conventions, transparency, and security.

    10. Tracking and Analyzing Coupon Performance

    • A guide on using WooCommerce’s built-in reporting tools to measure the effectiveness of your coupon campaigns and make data-driven decisions.

    11. Real-World Success Stories

    • Explore case studies of e-commerce businesses that have harnessed the power of WooCommerce coupons to drive sales, increase customer loyalty, and achieve remarkable results.

    12. Conclusion and Next Steps

    • A summary of the key takeaways from the guide and recommendations for implementing WooCommerce coupons effectively in your e-commerce business.

    Unlocking the power of WooCommerce coupons requires a strategic and informed approach. Whether you’re a seasoned e-commerce professional or just starting out, this comprehensive guide will equip you with the knowledge and tools you need to leverage WooCommerce coupons for maximum impact. Join us on this journey to empower your online store with the dynamic force of coupons, and watch as your sales and customer loyalty soar to new heights.

    If you need help implementing coupons on your woocommerce store get in touch.

    Photo by Carli Jeen on Unsplash

  • How to Limit Coupon Use to Certain Products in WooCommerce

    How to Limit Coupon Use to Certain Products in WooCommerce

    How to Limit Coupon Use to Certain Products in WooCommerce

    WooCommerce coupons are a fantastic way to attract customers and boost sales, but sometimes you may want to apply them selectively to specific products. This can be especially useful when you want to offer discounts for clearance items, promote certain product categories, or encourage the purchase of bundled products. In this blog post, we’ll show you how to limit coupon use to certain products in your WooCommerce store, giving you more control over your discount strategies.

    Table of Contents:

    1. Understanding the Need for Targeted Coupons

    • Explore why you might want to restrict coupon usage to particular products and how it can benefit your e-commerce strategy.

    2. Creating a New Coupon in WooCommerce

    • A step-by-step guide on how to create a new coupon in your WooCommerce dashboard, including defining the coupon’s details, such as the discount type and amount.

    3. Restricting Coupons by Product

    • Learn how to apply restrictions to your coupon by limiting its use to specific products. This can be done using product SKUs, categories, or individual product IDs.

    4. Using Product Categories to Apply Coupons

    • Discover how to create coupons that target entire product categories, making it easier to promote or clear out certain product groups.

    5. Customizing Coupon Codes for Product-Specific Discounts

    • Explore how to create unique and easily recognizable coupon codes for product-specific discounts, ensuring that customers can redeem the discounts without confusion.

    6. Setting Up Coupons for Bundled Products

    • Learn how to create bundled product discounts, where customers receive a special offer when they purchase a combination of products.

    7. Real-World Examples of Targeted Coupons

    • Dive into case studies of e-commerce businesses that have effectively utilized product-specific coupons to drive sales and promotions.

    8. Troubleshooting and Tips

    • Address common challenges and issues that may arise when creating product-specific coupons and explore tips to streamline the process.

    9. Advanced Coupon Strategies

    • For those seeking to take their coupon game to the next level, discover advanced strategies like cross-selling and upselling using product-specific coupons.

    10. Conclusion and Implementation

    • Summarize the key takeaways from the guide and provide actionable steps to implement product-specific coupons in your WooCommerce store.

    By learning how to limit coupon use to certain products, you can take your WooCommerce discount strategies to the next level, providing customers with targeted offers that are more relevant and compelling. Whether you’re looking to clear out inventory, promote specific product lines, or encourage bundled purchases, this guide will equip you with the knowledge and tools needed to fine-tune your coupon strategy for maximum impact. So, get ready to enhance your e-commerce store’s efficiency and profitability by targeting your customers with precisely tailored discounts.

  • WooCommerce Coupon Best Practices: Dos and Don’ts

    WooCommerce Coupon Best Practices: Dos and Don’ts

    Introduction – WooCommerce Coupon Best Practices

    WooCommerce, a widely used e-commerce platform for WordPress, offers an array of features to enhance your online store’s functionality. Among these features, WooCommerce coupons are an invaluable tool for attracting and retaining customers while boosting sales. However, like any powerful tool, they need to be wielded with care and precision to ensure they deliver the intended results. In this blog post, we’ll explore the best practices when it comes to using WooCommerce coupons, along with common mistakes to avoid.

    The Dos:

    1. Plan Your Coupon Strategy:

    • Start with a clear plan. Define your objectives, such as increasing sales, rewarding loyal customers, or clearing out excess inventory. Your strategy should align with your business goals.

    2. Use Descriptive Coupon Names:

    • Create easily recognizable and descriptive coupon names. This not only helps you keep track of your coupons but also assists customers in understanding the offer.

    3. Set Expiration Dates:

    • Coupons with expiration dates create a sense of urgency. Use this feature to encourage prompt purchases and to prevent customers from hoarding coupons.

    4. Offer Value to Customers:

    • Ensure that your coupon offers provide genuine value to customers. The discount or deal should be attractive enough to motivate action.

    5. Target Specific Customer Segments:

    • Utilize WooCommerce’s segmentation capabilities to target coupons to specific customer groups. This allows you to provide personalized offers to different types of customers, increasing relevance.

    6. Communicate Clearly:

    • Make sure your coupon terms and conditions are clearly communicated to customers. Avoid ambiguity and ensure they understand how to redeem the coupon.

    7. A/B Test Coupon Campaigns:

    • Experiment with different coupon offers and delivery methods. Use A/B testing to determine which coupons are the most effective at achieving your goals.

    8. Monitor and Analyze Performance:

    • Keep a close eye on your coupon campaigns’ performance. Use WooCommerce’s built-in reporting tools to gauge the effectiveness of your coupons and make data-driven decisions.

    The Don’ts:

    1. Overuse Discounts:

    • Avoid a constant barrage of discounts, as this can devalue your products and erode profit margins. Reserve coupons for strategic purposes.

    2. Ignore Expiry Dates:

    • Neglecting to set expiry dates can lead to customers using outdated coupons, causing confusion and potential revenue loss. Keep coupons current.

    3. Hide Restrictions:

    • Be transparent about any limitations or restrictions on your coupons. Hiding crucial details can lead to customer frustration and disappointment.

    4. Neglect Mobile Optimization:

    • With an increasing number of shoppers using mobile devices, ensure that your coupon redemption process is mobile-friendly. Test it thoroughly on various devices.

    5. Complex Redemption Processes:

    • Keep the redemption process simple and user-friendly. Cumbersome, multi-step processes can deter customers from using coupons.

    6. Disregard Security:

    • Implement security measures to prevent coupon misuse, such as limiting the number of times a coupon can be used by a single customer.

    Wrap Up – WooCommerce Coupon Best Practices

    If you have a specific requirement around coupons get in touch to see if I can code up a custom solution.

  • 10 Creative Ways to Use WooCommerce Coupons for Customer Loyalty

    10 Creative Ways to Use WooCommerce Coupons for Customer Loyalty

    Introduction – 10 Creative Ways to Use WooCommerce Coupons

    In the fiercely competitive world of e-commerce, customer loyalty is the holy grail for online businesses. Building a loyal customer base can mean the difference between surviving and thriving. One powerful tool in your arsenal to achieve this is WooCommerce coupons. While discounts are a common way to attract customers, there are creative ways to use WooCommerce coupons to foster customer loyalty. In this blog post, we’ll explore ten innovative strategies to keep your customers coming back for more.

    1. Personalized Discounts:

    Offer personalized coupons based on a customer’s purchase history or behavior. For example, if a customer frequently buys athletic shoes, send them a discount code for their favorite brand or related accessories.

    2. Exclusive Social Media Promotions:

    Reward your social media followers with exclusive coupon codes. Encourage customers to follow, share, and engage with your brand online to access these special discounts.

    3. Referral Discounts:

    Turn your customers into advocates by offering discounts for successful referrals. When a customer refers a friend who makes a purchase, both the referrer and the new customer can receive discounts.

    4. Birthday Treats:

    Send a birthday email with a coupon code. This personal touch makes customers feel valued and encourages them to return to your store to celebrate their special day.

    5. Gamified Coupons:

    Create a sense of excitement by using gamified coupons. Customers can spin a wheel, scratch off a card, or play a simple game to reveal their discount. This not only makes the process fun but also memorable.

    6. Milestone Coupons:

    Celebrate customer milestones, like the first purchase anniversary or the 10th order, with special coupons. Acknowledging these moments can create a strong emotional connection.

    7. Subscription Perks:

    If you offer subscription products, provide loyalty coupons to encourage customers to continue their subscriptions. Offer discounts, freebies, or exclusive access to new products.

    8. Abandoned Cart Recovery:

    Send abandoned cart reminder emails with an added incentive, like a coupon code, to entice customers to complete their purchase. This not only recovers potential sales but also shows customers you care.

    9. Seasonal and Holiday Coupons:

    Use holidays and seasons to your advantage. Create special discounts for various occasions, from Valentine’s Day to Black Friday. These themed coupons can create a sense of urgency and excitement.

    10. Review-Based Rewards:

    Encourage customers to leave reviews by offering discounts in return. Positive reviews not only help your brand’s reputation but also give customers a reason to return.

    Incorporating these creative strategies into your WooCommerce coupon marketing can help you build strong, long-lasting customer relationships. Remember that while discounts are an excellent way to attract customers, using them creatively to build customer loyalty is what truly sets your brand apart. Experiment with these ideas, track their effectiveness, and tailor them to fit your specific audience and business goals. By doing so, you’ll be well on your way to fostering a loyal and enthusiastic customer base for your e-commerce store.

    Wrap Up – 10 Creative Ways to Use WooCommerce Coupons

    If you need help setting up coupons for your site why not work with me to do that.

    Photo by Perry Merrity II on Unsplash

  • So I Spent $2,000 on youtube ads, here what I got for my money.

    So I Spent $2,000 on youtube ads, here what I got for my money.

    I’ve been running a paid advertising test on YouTube to see if it’s a good way to attract clients into my service business. Here’s a blog post on my results.

    Big Fat Lonely Zero

    I would love to say that I’m rolling in clients due to my ad spend on YouTube but I can tell you, dear reader I got nothing but a bill from Google.

    No email signups, no leads, absolutely nothing. Wait! That’s not quiet correct, I got a lot of click throughs to my site that generate nothing. I don’t want to sound bitter about this experiment, because we need to test these things, but it was 100% a failure.

    I know you are a little disappointed and were looking for that key to building a killer sales funnel, but YouTube does not seem to the traffic source you need to sell services.

    My Thinking Behind Running YouTube Ads

    YouTube can be thought of as a a search engine, it’s not just an algorithm throwing cute cat video at you.

    How many times have you done to YouTube, how to I change the widget on my 2008 version of a car, and some expert has recorded a how to video.

    I thought I could link with people searching for how to videos to build their sites and convince them to hire me instead. By was I wrong 🙂

    How I Planned To Convert The Traffic

    I used a series of different funnels to see if I could capture peoples email addresses from a click on YouTube and then convert them using an email sequence. Here’s what I tried

    A webinar – I sent people to this webinar landing page to teach people about the 5 pillars of optimization so people can earn more money from their WooCommerce store, no signups.

    My free code generator – I tried to sell the AI story that we can all code using AI, nope nobody wanted to enter their email address to get free code.

    A squeeze page to VSL – I went old school and had a Video Sales Letter (VSL) to sell my service, no email addresses for me.

    UPDATE – I was running YouTube ads as a more scalable way to try and attract new clients, in my mind it’s faster and more scalable than content marketing.

    What I Found From This Experiment

    I got loads of traffic, YouTube will give you that. My analytics showed people stayed for next to no time and clicked back to their videos.

    I got loads of shite traffic from display networks. YouTube runs their ads on other people sites, and they can earn money via Adsense for clicks

    There is no way to limit ads being shown on the display network and as a result I was getting people from sites like:

    • https://animal.mamamath.net/
    • https://www.poemhunter.com/
    • https://hot-thai-kitchen.com/
    • https://en.dailypakistan.com.pk/

    None of these are related to my services and it looks like I was probably getting bot clicked for ad revenue.

    YouTube Is The Biggest TV Station In The World

    Service providers, think of YouTube as a TV network, no one wants the ads just like traditional TV.

    People are there to be entertained or find how to videos to do it themself, not find and hire people.

    Wrap Up

    I’m licking my wounds and moving on from YouTube advertising, it didn’t work for me, so onto the next shiny objec.. ooh look a squirrel.

    As a side note I sent a single email to my list of existing client’s and generated loads of work, it’s easier to sell to people that know, like and trust you rather than selling to a cold person on YouTube.

    I think YouTube will work with people selling how to training, I just don’t think it’s the place to sell services.

    If you would like to work with me to build your WooCommerce store, let’s use the tried and test content marketing approach by adding a link to my hire me page at the end of my content.

    Photo by Christine Roy on Unsplash

  • Adding linkedin Tracking Code to Your WooCommerce Store

    Adding linkedin Tracking Code to Your WooCommerce Store

    Introduction – Adding linkedin Tracking Code to Your WooCommerce Store

    LinkedIn Ads are a powerful tool for reaching a professional audience and driving valuable leads to your e-commerce store. To maximize the effectiveness of your LinkedIn advertising campaigns, it’s essential to add a LinkedIn ad tracking code to your WooCommerce store. In this step-by-step guide, we’ll walk you through the process of adding a LinkedIn ad tracking code to your WooCommerce store.

    Step 1: Create a LinkedIn Ads Account

    If you don’t already have a LinkedIn Ads account, you’ll need to create one. Visit the LinkedIn Ads platform at https://www.linkedin.com/ad/ and sign in or create an account.

    Step 2: Set Up Your Ad Campaign

    Before you can add the tracking code to your WooCommerce store, you need to set up your LinkedIn ad campaign. Define your campaign objectives, target audience, and ad creatives to get started.

    Step 3: Create a LinkedIn Insight Tag

    The LinkedIn Insight Tag is a piece of code that you’ll add to your WooCommerce store to track conversions and gather valuable data on your website visitors. To create the Insight Tag, follow these steps:

    1. **Log in to your LinkedIn Ads account.
    2. **Click on “Account Assets” in the top menu and select “Insight Tag” from the dropdown.
    3. **Click the “+ Add Insight Tag” button.
    4. **Name your Insight Tag (e.g., “WooCommerce Store Tracking”).
    5. **Choose “Install Myself.”
    6. **Copy the provided code snippet. This code contains your unique Insight Tag that you’ll add to your WooCommerce store.

    Step 4: Add the LinkedIn Insight Tag to Your WooCommerce Store

    Now, let’s integrate the LinkedIn Insight Tag into your WooCommerce store. Here’s how:

    1. **Log in to your WordPress admin dashboard.
    2. **Navigate to “Plugins” and click on “Add New.”
    3. **Search for a plugin that allows you to add code snippets to your website. A popular option is “Insert Headers and Footers.”
    4. **Install and activate the plugin.
    5. **In your WordPress dashboard, go to “Settings” and select “Insert Headers and Footers.”
    6. **Paste the LinkedIn Insight Tag code you copied earlier into the “Scripts in Header” section.
    7. **Save your changes.

    Step 5: Verify the Installation

    To ensure that the LinkedIn Insight Tag is properly installed on your WooCommerce store, follow these steps:

    1. **Access your WooCommerce store as a customer.
    2. **Navigate to a page where you want to track conversions, such as the order confirmation or thank-you page.
    3. **Perform a test conversion action, such as completing a purchase.
    4. **Return to your LinkedIn Ads account and go to the “Insight Tag” section.
    5. **Click “Verify My Tag.” LinkedIn will check if the Insight Tag is active on your website and tracking conversions.

    Step 6: Set Up Conversion Tracking in LinkedIn Ads

    Now that the Insight Tag is installed, you can set up conversion tracking for your LinkedIn ad campaigns. Follow these steps:

    1. **In your LinkedIn Ads account, go to the “Conversion Tracking” section.
    2. **Click “+ Create a Conversion.”
    3. **Choose the type of conversion you want to track (e.g., “Website Conversions”).
    4. **Configure the conversion settings, such as the conversion name, category, and value.
    5. **Select the Insight Tag you created earlier from the dropdown.
    6. **Define the conversion attribution settings based on your tracking needs.
    7. **Save your conversion tracking setup.

    Step 7: Monitor and Optimize Your LinkedIn Ad Campaigns

    With conversion tracking in place, you can now monitor the performance of your LinkedIn ad campaigns accurately. Use the data you collect to optimize your ads, refine your targeting, and maximize the return on investment (ROI) for your e-commerce store.

    Conclusion – Adding LinkedIn Tracking Code to Your WooCommerce Store

    Adding a LinkedIn ad tracking code to your WooCommerce store is a critical step in understanding the impact of your LinkedIn advertising efforts. By following the steps outlined in this guide, you can harness the power of data-driven marketing and make informed decisions to drive success for your e-commerce business on LinkedIn.

    If you need help setting up the linkeding tracking codes for your woocommerce store why not work with me.

    Photo by Claudio Schwarz on Unsplash.

  • How to Add Google Ads Conversion Events to Your WooCommerce Store

    How to Add Google Ads Conversion Events to Your WooCommerce Store

    Introduction – How to Add Google Ads Conversion Events to Your WooCommerce Store

    Running successful Google Ads campaigns is a cornerstone of e-commerce success, but how do you know if your ads are driving real results? The answer lies in setting up Google Ads conversion events on your WooCommerce store. By tracking these events, you can measure the effectiveness of your ad campaigns and make data-driven decisions for better ROI. In this step-by-step guide, we’ll show you how to add Google Ads conversion events to your WooCommerce store.

    Step 1: Create a Google Ads Account

    If you don’t already have one, create a Google Ads account or log in to your existing account.

    Step 2: Set Up Conversion Tracking in Google Ads

    Before you can add conversion events to your WooCommerce store, you must enable conversion tracking in your Google Ads account. Here’s how:

    1. **Access your Google Ads dashboard and click on “Tools & Settings” in the upper right corner.
    2. **Under the “Measurement” section, select “Conversions.”
    3. **Click the “+” button to create a new conversion action.
    4. **Choose “Website” as the source of your conversions.
    5. **Configure the conversion settings based on your goals:
    • Category: Select the most appropriate category (e.g., Purchase, Add to Cart, Sign-up).
    • Name: Give your conversion action a descriptive name (e.g., “Purchase”).
    • Value: Set the conversion value (e.g., average order value for “Purchase” events).
    • Count: Choose how you want to count conversions (Every or One).
    • Conversion Window: Define the time frame during which a conversion is attributed to an ad click.
    • Attribution Model: Choose an attribution model that suits your tracking needs.
    • Include in “Conversions”: Decide whether to include this conversion action in your “Conversions” column for campaign optimization.
    1. **Click “Create and Continue.” You’ll receive a conversion tracking tag (code) that you need to install on your WooCommerce store.

    Step 3: Add the Conversion Tracking Tag to Your WooCommerce Store

    Now that you have your conversion tracking tag, it’s time to install it on your WooCommerce store. Here’s how to do it:

    1. **Log in to your WordPress admin dashboard.
    2. **Navigate to “Plugins” and click on “Add New.”
    3. **Search for and install a Google Ads conversion tracking plugin, such as “Insert Headers and Footers.”
    4. **Activate the plugin.
    5. **In your WordPress dashboard, go to “Settings” and find the “Insert Headers and Footers” option.
    6. **Paste the conversion tracking tag (code) you received from Google Ads into the “Scripts in Header” section.
    7. **Save your changes.

    Step 4: Test Your Conversion Tracking

    It’s crucial to test whether your conversion tracking is working correctly. To do this, follow these steps:

    1. **Access your WooCommerce store as a customer.
    2. **Perform the action you want to track (e.g., make a purchase or add a product to the cart).
    3. **Wait a few hours, and then check your Google Ads dashboard to ensure the conversion is recorded.

    Step 5: Optimize Your Google Ads Campaigns

    With conversion tracking in place, you can now analyze the performance of your Google Ads campaigns with real data. Use this information to optimize your ads, allocate budgets effectively, and maximize your ROI.

    Conclusion – How to Add Google Ads Conversion Events to Your WooCommerce Store

    Adding Google Ads conversion events to your WooCommerce store is a game-changer for e-commerce businesses. It empowers you to measure the impact of your advertising efforts accurately and refine your strategies for better results. By following the steps outlined in this guide, you can unlock the full potential of your Google Ads campaigns and drive growth for your online store.

    If you need help implementing Google conversion tracking let me know.

    Photo by Anthony Rosset on Unsplash

  • A Comprehensive Guide to Setting Up Google Analytics Ecommerce Events on WooCommerce

    A Comprehensive Guide to Setting Up Google Analytics Ecommerce Events on WooCommerce

    Introduction – Google Analytics Ecommerce Events on WooCommerce

    Understanding how your e-commerce store is performing is crucial for making data-driven decisions and optimizing your online business. Google Analytics is a powerful tool that provides valuable insights into user behavior, traffic sources, and conversions. To take your WooCommerce store to the next level, it’s essential to set up Google Analytics Ecommerce Events. In this comprehensive guide, we’ll walk you through the process of configuring Ecommerce Events for your WooCommerce store.

    What are Google Analytics Ecommerce Events?

    Google Analytics Ecommerce Events are custom events that allow you to track specific user interactions on your online store. These events help you gain insights into the entire customer journey, from product views and add-to-cart actions to successful purchases. With this data, you can make informed decisions to improve your website’s user experience and boost sales.

    Step 1: Set Up Google Analytics

    If you haven’t already, create a Google Analytics account and set up a property for your WooCommerce store. You’ll need your unique Tracking ID (e.g., UA-123456789-1) for the next steps.

    Step 2: Install a Google Analytics Plugin for WooCommerce

    To simplify the process of adding Google Analytics Ecommerce Events to your WooCommerce store, consider using a dedicated plugin like “MonsterInsights” or “Enhanced Ecommerce Google Analytics Plugin for WooCommerce.” These plugins provide a user-friendly interface for integrating Google Analytics with your store.

    Here’s how to install one of these plugins:

    a. Log in to your WordPress admin dashboard.

    b. Navigate to Plugins > Add New.

    c. Search for your chosen Google Analytics plugin (e.g., MonsterInsights).

    d. Install and activate the plugin.

    Step 3: Connect Your WooCommerce Store to Google Analytics

    Once the plugin is activated, you need to connect your WooCommerce store to Google Analytics.

    a. Go to the plugin’s settings page (usually found under “Insights” or “Analytics” in your dashboard).

    b. Click on “Authenticate with your Google account.”

    c. Follow the prompts to grant the plugin access to your Google Analytics account. This will link your WooCommerce store to your Google Analytics property.

    Step 4: Enable Ecommerce Tracking

    With your WooCommerce store connected to Google Analytics, it’s time to enable Ecommerce Tracking.

    a. In your Google Analytics plugin settings, find the “Ecommerce” or “Ecommerce Tracking” section.

    b. Turn on Ecommerce Tracking.

    c. Save your settings.

    Step 5: Set Up Ecommerce Events

    Now that Ecommerce Tracking is enabled, you can start setting up specific Ecommerce Events for your WooCommerce store. These typically include tracking product views, add-to-cart actions, and successful purchases.

    a. In your Google Analytics plugin settings, find the “Events Tracking” or “Ecommerce Events” section.

    b. Configure each event individually:

    • Product View Event: Set the event category, action, and label to track when users view product pages.
    • Add to Cart Event: Configure the event settings to track when users add products to their cart.
    • Purchase Event: Set up the purchase event to track completed transactions.

    c. Save your event settings.

    Step 6: Test Your Ecommerce Events

    To ensure that your Ecommerce Events are working correctly, perform a few test transactions on your store and verify that the events are being tracked in your Google Analytics account.

    Step 7: Analyze Your Data

    With Ecommerce Events set up, you can now access valuable data in your Google Analytics account. Analyze user behavior, conversion rates, and revenue to make informed decisions and optimize your WooCommerce store for better performance.

    Conclusion – Google Analytics Ecommerce Events on WooCommerce

    Setting up Google Analytics Ecommerce Events on your WooCommerce store is a vital step in understanding your customers’ behavior and improving your online business. By tracking specific user interactions, you can make data-driven decisions to enhance the user experience, increase conversions, and ultimately boost sales. Follow the steps outlined in this guide, and you’ll be well on your way to harnessing the power of Ecommerce Events for your WooCommerce store’s success.

    If you need help setting up the eCommerce events on your WooCommerce store why not hire me.

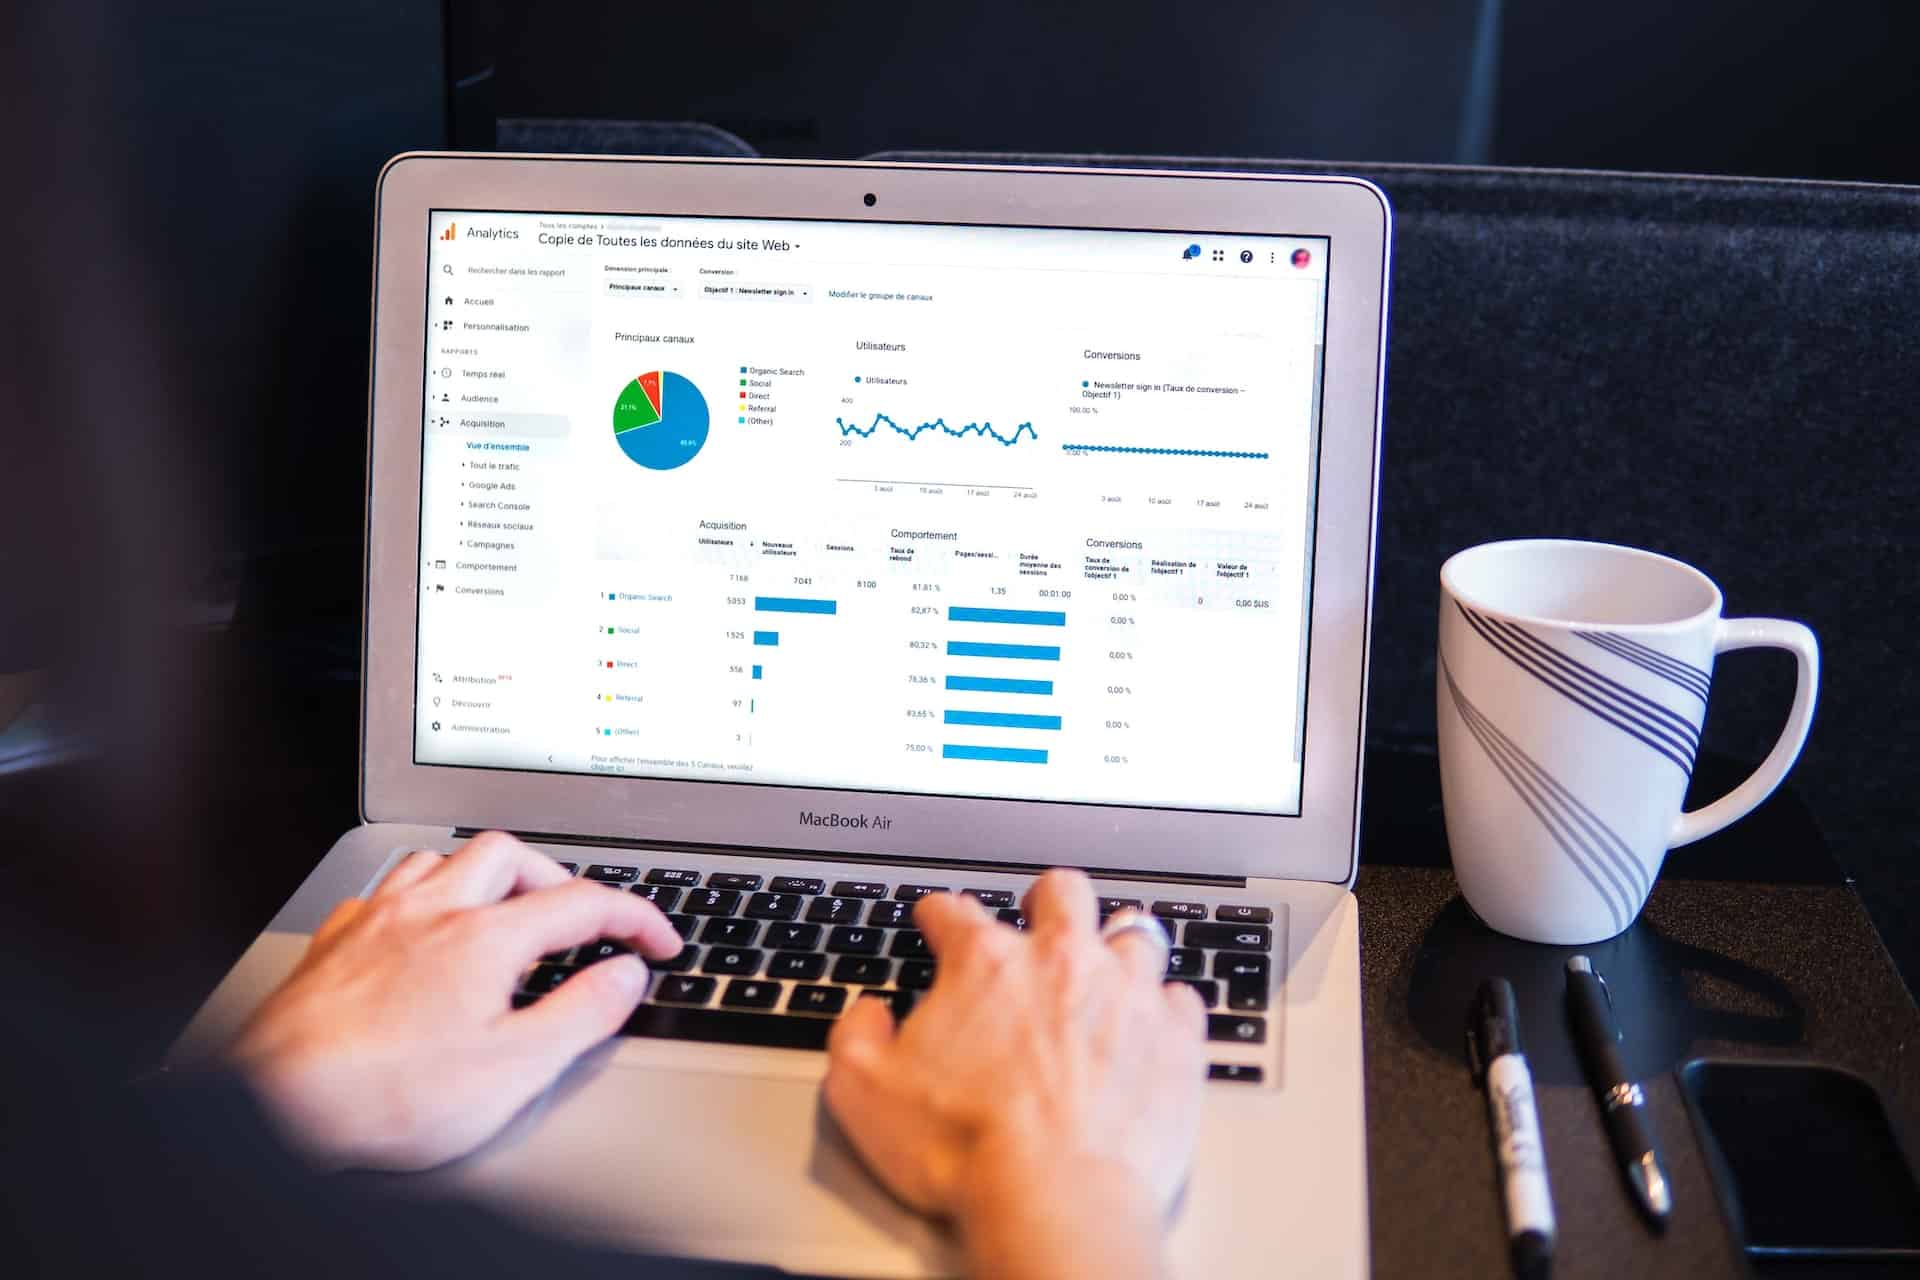
    Photo by Myriam Jessier on Unsplash

  • A Step-by-Step Guide to Adding the Facebook Pixel to Your WooCommerce Store

    A Step-by-Step Guide to Adding the Facebook Pixel to Your WooCommerce Store

    Introduction – Adding the Facebook Pixel to Your WooCommerce Store

    In today’s digital age, understanding your customers and their online behavior is crucial for the success of your e-commerce business. The Facebook Pixel is a powerful tool that allows you to track user interactions on your website and measure the effectiveness of your Facebook advertising campaigns. If you’re running a WooCommerce store and want to harness the power of the Facebook Pixel, you’re in the right place. In this step-by-step guide, we’ll walk you through the process of adding the Facebook Pixel to your WooCommerce store.

    What is the Facebook Pixel?

    Before we dive into the implementation process, let’s briefly explain what the Facebook Pixel is and why it’s so important for e-commerce businesses.

    The Facebook Pixel is a piece of code provided by Facebook that you add to your website. It helps you track various user interactions, such as page views, purchases, and form submissions. This data is invaluable for optimizing your Facebook advertising campaigns, retargeting visitors, and understanding your audience’s behavior.

    Now, let’s get started on adding the Facebook Pixel to your WooCommerce store.

    Step 1: Create a Facebook Business Manager Account

    If you don’t already have one, create a Facebook Business Manager account. This is where you’ll manage your Facebook Pixel and advertising campaigns. Visit https://business.facebook.com/ to get started.

    Step 2: Create a Facebook Pixel

    Once you’re in your Facebook Business Manager account, go to the “Events Manager” section and select “Pixels.” Click on “Create a Pixel” and follow the setup wizard. Give your Pixel a name, accept the terms, and click “Create Pixel.”

    Step 3: Locate Your Pixel ID

    After creating your Pixel, you’ll receive a unique Pixel ID. Keep this ID handy, as you’ll need it for the next steps.

    Step 4: Install the Facebook Pixel on Your WooCommerce Store

    Now, it’s time to add the Facebook Pixel to your WooCommerce store. There are a few methods to do this, but we’ll cover the most common one – using a plugin:

    a. Log into your WordPress Admin Dashboard.

    b. Navigate to Plugins > Add New.

    c. Search for the “Facebook for WooCommerce” plugin and click “Install Now.”

    d. After installation, click “Activate.”

    e. In your WordPress dashboard, go to WooCommerce > Settings > Integration > Facebook.

    f. Enter your Pixel ID in the “Facebook Pixel” field and save changes.

    Step 5: Test Your Pixel

    It’s crucial to ensure that your Facebook Pixel is tracking events correctly. Facebook provides a Chrome extension called “Facebook Pixel Helper” that helps you verify if the Pixel is functioning as expected. Install the extension in your browser and visit your WooCommerce store to check for any Pixel-related issues.

    Step 6: Set Up Event Tracking

    The Facebook Pixel can track various events on your website, such as purchases, add to cart actions, and more. To set up event tracking in WooCommerce, you may need additional configuration or plugins, depending on your specific needs. You can consult the WooCommerce documentation or seek help from a developer to implement event tracking correctly.

    Step 7: Create Custom Audiences and Run Campaigns

    With your Facebook Pixel in place and tracking events, you can now create custom audiences based on user interactions and run targeted Facebook advertising campaigns. This allows you to retarget visitors, create lookalike audiences, and optimize your ad spend for better results.

    Conclusion – Adding the Facebook Pixel to Your WooCommerce Store

    Adding the Facebook Pixel to your WooCommerce store is a fundamental step in understanding your customers’ behavior and improving your advertising efforts on Facebook. With the Pixel installed, you can measure the success of your campaigns, track user interactions, and ultimately grow your e-commerce business. Follow the steps outlined in this guide, and you’ll be well on your way to harnessing the power of the Facebook Pixel for your WooCommerce store’s success.

    If you need help implementing the facebook pixel on your get a quote.

    Photo by Michael Maasen on Unsplash

  • WooCommerce social proof

    WooCommerce social proof

    In the bustling world of e-commerce, trust is the cornerstone of every successful online business. As consumers navigate through an ever-expanding digital marketplace, they often rely on one crucial factor to make informed purchase decisions – social proof. This phenomenon is the driving force behind the popularity of customer reviews, ratings, and testimonials. It’s no wonder that businesses worldwide are constantly seeking innovative ways to harness the power of social proof to gain their customers’ trust.

    In our increasingly interconnected world, where the line between online and offline is becoming increasingly blurred, the significance of customer reviews cannot be overstated. It’s not just about what you say about your product or service; it’s also about what your customers are saying. One powerful tool that has revolutionized the way businesses leverage customer feedback is WooCommerce, a robust e-commerce platform for WordPress.

    In this video post, we’re going to dive deep into the world of WooCommerce reviews and explore how you can turn them into your secret weapon for building trust and driving sales. We’ll uncover the myriad benefits of using WooCommerce reviews as a form of social proof, from building credibility to boosting conversion rates. So, whether you’re a seasoned e-commerce pro or just starting your online business journey, this video is a must-watch to unlock the true potential of your customer reviews.

    Let’s embark on this journey together as we unveil the secrets of using WooCommerce reviews to propel your business to new heights, all by simply letting your customers speak for you. After all, in the digital age, your customers’ voices can be your most powerful marketing asset.

    I was feeling lazy so I had ChatGPT write the intro :).

    Video

    Shop Magic Plugin

    Wrap Up – WooCommerce Social Proof

    Reviews are a great way to show social proof on your single product pages, if you automate collection as well you have a great system to help optimize your site. If you need help implementing review please get in touch.

    Photo by Rob Curran on Unsplash

  • Weird 403 and 500 Errors

    Weird 403 and 500 Errors

    Overview – Weird 403 and 500 Errors

    I was hired by a client to investigate some wierd 500 and 403 errors in their WooCommmerce store, 500 errors code are an error processing a page and 403 are forbidden warning messages.

    It turns out the site had been hacked, and a vulnerability in my clients theme was at the root of this issue.

    I removed all malware and hardened security against future attacks on the store.

    Fake admin users had been created by the hackers these were deleted and the IP addresses of the hackers banned from the site.

    Not what I expected when I took on this site I was thinking this was a back end database issue, but I’ve got a lot of experience recovering hacked sites so it was another day at the office.

    Video

    Here’s a video explainer of what happened to the site.

    Photo by Clint Patterson on Unsplash

    Wrap Up

    If you need help securing or recovering your WooCommerce store from hackers get in touch.