Neil Matthews

Blog

  • What Will Happen To Your Digital Estate

    What Will Happen To Your Digital Estate

    Trigger warning, this blog post is a little dark and talks about death and what happens to your digital stuff after you are gone.

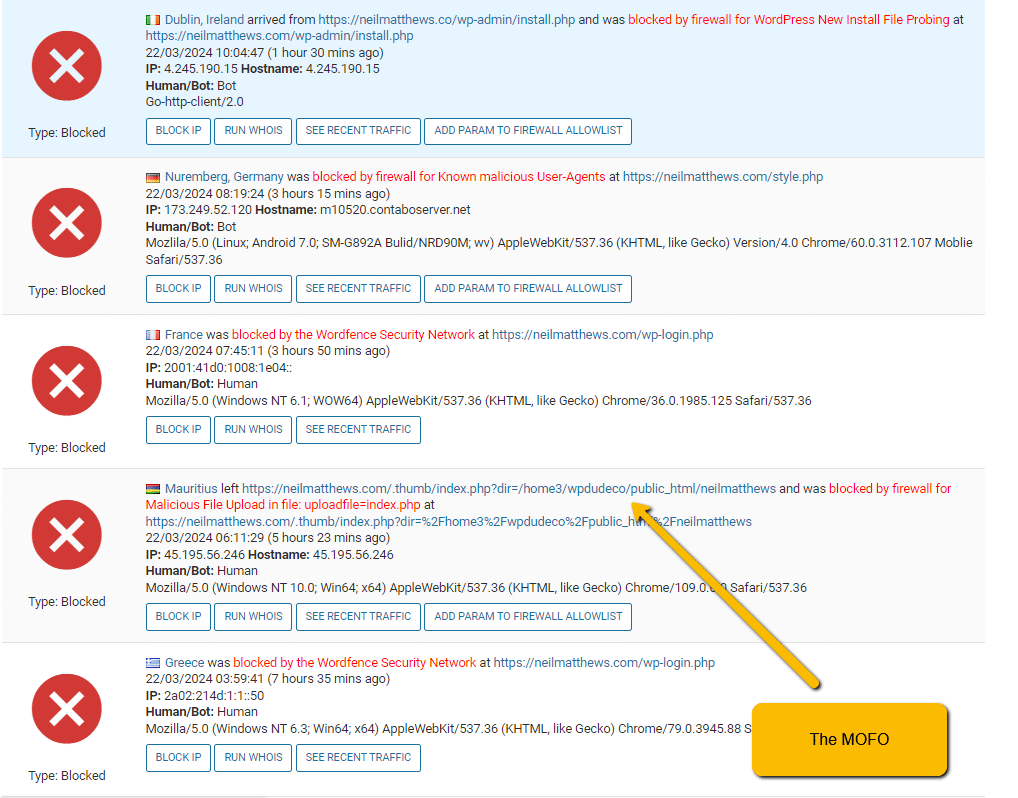
    One of my clients sadly died recently. Invoices were going unpaid, emails were being bounced. I only learned about his passing when an obituary was placed on the site I was maintaining for him. I’m guessing no-one knew I maintained his site for him.

    This has caused some introspection on my part, and has made me ask the question, what will happen to my digital estate when I finally die?

    The answer was a little bit worrying, my wife doesn’t know details of my Stripe account, she doesn’t know who my customers are or what I do for them. She doesn’t have any contact details for my team and how to keep the recurring income from my maintenance plans moving forward. This could be a valuable passive income stream for her and my kids.

    I have a feeling that my digital assets will just wither away or even be a liability (services being paid for but not delivered).

    What can I do to make sure these assets are passed to her via my digital estate.

    First of all, let’s define what an estate is:

    Everything owned by a person who has died is known as their estate. The estate may be made up of: money, both cash and money in a bank or building society account. This could include money paid out on a life insurance policy. money owed to the person who has died.

    Real estate, stock and share, money in the bank or possessions are things traditionally classed as your estate, but we have a series of new things that I am calling my digital estate, while these are virtual they still have value.

    Those of us building online businesses are creating digital assets that a) Have value and b) can be passed on in our estate.

    Here are some of things I’ve been thinking about as I write this blog post:

    • Websites
    • Email lists
    • Payment providers accounts (Stripe/Paypal etc)
    • Client/Customer lists
    • Contractor details
    • Suppliers
    • Social media accounts
    • Email accounts
    • Domain names
    • Access to my SaaS accounts (Trello, Freshbooks and Managewp)

    What Am I Going To Do?

    So I’m going to write up a document and keep it with my will. I’m going to think about the things that have value and how she can keep them or dispose of them as she needs (or my kids need if she goes first).

    I’m going to detail all the “digital things” I have with any monetary value. I’m thinking about areas of my business that have recurring income value and how they can keep working without me, I already have my maintenance plan largely running without me, can it run without me permanently and be passed on as an asset for example.

    I’m going to write up how these assets can be sold or retained for a recurring income.

    I’m going to document how to recover access to all these accounts, for example I found this to recover a google account.

    I’m going to include in that document any debts I have, recurring invoices for software, how to pay the contractors I use.

    And then finally we’ll have to sit down and go through this, that will be a fun session won’t it.

    Wrap Up

    That went dark pretty quickly didn’t it. Do you have a plan in place for your digital assets?

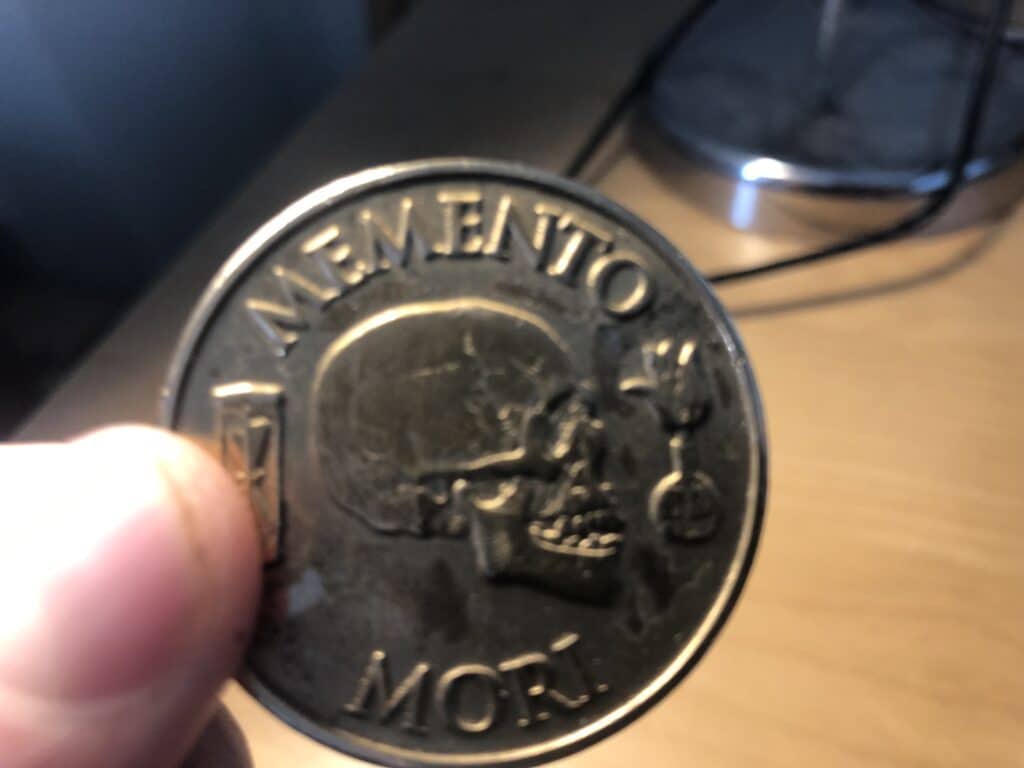
    I study stoic philosophy and one of their ideas is Momento Mori, remember you will die or my favourite translation remember you have to die, it’s the process of meditating on your own mortality. It’s a good thing not a macabre thing.

    If we think about our own mortality it helps us to put things into perspective, why am I worrying about that trivial thing when in the greater scheme of things it really won’t matter.

     “You could leave life right now. Let that determine what you do and say and think.”

    Marcus Aurelius

  • Customizing the WordPress Login Screen

    Customizing the WordPress Login Screen

    Introduction – Customizing the WordPress Login Screen
    The WordPress login screen serves as the gateway to your website’s backend, providing access to administrators, editors, contributors, and subscribers. While its default appearance is functional, customizing the login screen can add a touch of professionalism, reinforce your brand identity, and enhance the user experience. In this guide, we’ll explore various ways to customize the WordPress login screen, from simple tweaks to advanced modifications, using plugins that simplify the process.

    1. Customize with LoginPress:
      LoginPress is a powerful plugin that allows you to customize every aspect of the WordPress login screen with ease. From changing the background image and colors to adding custom logos and text, LoginPress offers a user-friendly interface for personalizing the login experience.

    Key features of LoginPress include:

    • Background customization: Choose from pre-designed backgrounds or upload your own images to create a unique login screen.
    • Logo and branding: Replace the default WordPress logo with your brand logo and customize the login form’s appearance to match your site’s aesthetics.
    • Text and messaging: Modify the login form’s text, labels, and error messages to align with your brand voice and tone.
    • Login form styling: Adjust the size, color, and typography of the login form fields and buttons for a cohesive look.

    Download LoginPress

    1. Enhance Security with Two-Factor Authentication:
      While customizing the login screen’s appearance is important, prioritizing security is equally crucial. Two-factor authentication (2FA) adds an extra layer of protection by requiring users to verify their identity using a second factor, such as a one-time code sent to their mobile device.

    Key features of a 2FA plugin like Two Factor Authentication:

    • Increased security: Protect your site from unauthorized access by requiring users to verify their identity with a second factor.
    • Multiple authentication methods: Choose from various 2FA methods, including SMS, email, authenticator apps, or hardware tokens.
    • User-friendly setup: Implementing 2FA is straightforward for users, with clear instructions provided during the setup process.
    • Compatibility: Most 2FA plugins are compatible with popular login customization plugins, ensuring seamless integration with your customized login screen.

    Download Two Factor Authentication

    1. Add Social Login Options with Nextend Social Login:
      Streamline the login process for users by offering social login options alongside the traditional username and password fields. Nextend Social Login integrates with popular social media platforms like Facebook, Google, and Twitter, allowing users to log in quickly using their existing accounts.

    Key features of Nextend Social Login:

    • Seamless integration: Add social login buttons to the WordPress login screen without requiring users to create new accounts.
    • Customization options: Customize the appearance and placement of social login buttons to match your site’s design.
    • User data synchronization: Automatically sync user profile data from social media accounts to WordPress, simplifying account management for users.
    • Enhanced user experience: Improve user engagement and conversion rates by reducing login friction and offering a convenient login alternative.

    Download Nextend Social Login

    Conclusion:
    Customizing the WordPress login screen is an effective way to enhance your site’s branding, security, and user experience. With plugins like LoginPress, Two Factor Authentication, and Nextend Social Login, you can personalize the login process to align with your brand identity, strengthen security measures, and streamline user interactions. Whether you’re a blogger, e-commerce store owner, or corporate website administrator, investing in login screen customization plugins can elevate your site’s professionalism and leave a lasting impression on visitors.

  • Understanding WordPress User Roles: Administrator, Editor, Contributor, and Subscriber

    Understanding WordPress User Roles: Administrator, Editor, Contributor, and Subscriber

    Introduction – Understanding WordPress User Roles
    WordPress, being one of the most popular content management systems globally, empowers millions of websites across various niches. Central to its functionality is the concept of user roles, which determine the level of access and permissions granted to individuals interacting with the site. In this guide, we’ll delve into the various user roles in WordPress—Administrator, Editor, Contributor, and Subscriber—and understand their respective roles and responsibilities.

    1. Administrator:
      The Administrator is the most powerful user role in WordPress, with complete control over all aspects of the site. Administrators have the authority to manage users, install and activate plugins, edit themes, modify settings, publish or delete content, and perform any other administrative tasks. They essentially have unrestricted access to the site’s backend and can make changes that affect its entire functionality. It’s crucial to limit the number of administrators to trusted individuals to maintain security.

    Responsibilities of an Administrator:

    • Managing user accounts: Creating, editing, or deleting user accounts and assigning roles.
    • Installing and managing plugins and themes.
    • Configuring site settings: Adjusting general settings, reading settings, permalinks, etc.
    • Publishing and managing content: Creating, editing, and deleting pages, posts, and custom post types.
    • Handling site security: Implementing security measures and monitoring user activities.
    1. Editor:
      Editors have significant control over content management on a WordPress site. They can publish, edit, and delete posts and pages created by any user, including other editors. However, they do not have access to administrative functions like plugin installation or theme customization. Editors are ideal for managing content workflows, ensuring quality, and maintaining consistency across the site.

    Responsibilities of an Editor:

    • Reviewing and editing content: Ensuring accuracy, consistency, and adherence to style guidelines.
    • Publishing content: Approving and scheduling posts and pages for publication.
    • Managing categories and tags: Organizing content for improved navigation and SEO.
    • Monitoring user-generated content: Moderating comments and user submissions.
    1. Contributor:
      Contributors have limited capabilities compared to administrators and editors. They can create and edit their own posts but cannot publish them directly. Instead, their submissions are subject to review and approval by editors or administrators. This role is suitable for guest authors, freelance writers, or individuals who contribute occasional content to the site.

    Responsibilities of a Contributor:

    • Creating content: Drafting posts and submitting them for review.
    • Editing own content: Making revisions to submitted posts based on feedback.
    • Collaborating with editors: Communicating feedback and suggestions for improvement.
    1. Subscriber:
      Subscribers have the most restricted role on a WordPress site. They can log in, edit their profiles, and leave comments on posts, but they cannot create or modify content. Subscribers are typically users who want to receive updates from the site or engage in discussions through comments.

    Responsibilities of a Subscriber:

    • Managing profile: Updating personal information, including email address and display name.
    • Engaging with content: Reading posts and leaving comments on published content.

    Conclusion:
    Understanding the various user roles in WordPress is essential for effective site management and user access control. By assigning appropriate roles to individuals based on their responsibilities and privileges, site owners can streamline workflows, maintain security, and ensure a seamless user experience. Whether you’re an administrator, editor, contributor, or subscriber, each role plays a vital role in contributing to the success of a WordPress site.

    Photo by Tim Mossholder on Unsplash

  • Mastering WordPress User Permissions with User Role Editor Plugin

    Mastering WordPress User Permissions with User Role Editor Plugin

    Introduction – User Role Editor Plugin
    Managing user roles and permissions efficiently is essential for any WordPress website owner. Whether you run a personal blog, an e-commerce store, or a corporate website, controlling who can access what features and content is crucial for security and organization. Fortunately, with the right tools, such as the User Role Editor plugin, WordPress users can easily customize and manage user roles and permissions to fit their specific needs.

    What is User Role Editor Plugin?
    User Role Editor is a powerful WordPress plugin that empowers site administrators to manage user roles and capabilities with ease. It provides a user-friendly interface for customizing default user roles, creating new roles, and assigning or revoking capabilities for each role.

    Key Features:

    1. Role Management: User Role Editor allows administrators to modify existing user roles or create new ones from scratch. This feature is particularly useful for tailoring roles to match the unique requirements of your website.
    2. Capability Assignment: With User Role Editor, you can finely tune the permissions granted to each user role by assigning or revoking specific capabilities. This granular control ensures that users have access only to the features they need, reducing the risk of unauthorized actions.
    3. Role Duplication: Rather than creating new roles from scratch, User Role Editor enables you to duplicate existing roles and make necessary modifications. This feature saves time and ensures consistency across different user groups.
    4. Content Protection: By restricting access to certain content based on user roles, User Role Editor helps you protect sensitive information and control who can view or modify specific pages, posts, or custom post types.
    5. Multisite Support: For WordPress Multisite installations, User Role Editor seamlessly integrates with the network administration interface, allowing super administrators to manage user roles across all sites within the network.

    How to Use User Role Editor:

    1. Install and Activate: Begin by installing the User Role Editor plugin from the WordPress plugin repository. Once activated, navigate to the “Users” menu in your WordPress dashboard and select “User Role Editor.”
    2. Customize Roles: From the User Role Editor interface, you can customize existing roles or create new ones by specifying a name and selecting capabilities from a comprehensive list. After making your adjustments, save your changes to apply the modifications.
    3. Assign Roles: After defining your custom roles, you can assign them to users from the WordPress Users screen. Simply edit a user profile, select the appropriate role from the dropdown menu, and save your changes.
    4. Fine-Tune Permissions: To further refine permissions, use the capability management feature to assign or revoke specific capabilities for each role. This level of control ensures that users have precisely the access they require.

    Conclusion:
    User Role Editor is an indispensable tool for WordPress site administrators seeking to manage user roles and permissions effectively. With its intuitive interface and powerful features, this plugin simplifies the process of customizing roles, assigning permissions, and protecting content. Whether you’re running a small blog or a complex multisite network, User Role Editor empowers you to maintain control over user access and enhance the security of your WordPress website.

    Enhance your WordPress experience by installing User Role Editor today!

    Download User Role Editor

    User Role Editor Documentation

  • So I Got Hacked … Again!

    So I Got Hacked … Again!

    Malware was injected into my site this week, it’s fine I’ve removed it and everything is fine, I just thought I would write a cautionary blog post to explain what happened and to show getting hacked can happen to anyone, even a so called WordPress developer.

    You need to have tools in place to monitor for and react to malware injections. I offer this as part of my maintenance plan.

    I was planning to write my weekly post and I was getting a lot of weird errors, I started working on the usual trouble shooting issues to find out what was wrong, and I noticed a weird directory called .thumb scattered throughout my site. Then I realised my index.php has malware injected into it.

    Shite, I’ve been hacked!

    A Deactivated Plugin Was At The Root Of The Problem

    At the root of the problem is a plugin that was on my site called Memberpress. I’m not using this plugin, it’s deactivated and it does not have a license so no updates are being applied. That’s why it was vulnerable.

    Even a plugin that is not active can still be called and code injected.

    Thanks My Hacking Friend From Mauritius

    I checked my logs and it looks like someone from Mauritius did the deed on me and injected the malware, I went to Cloudflare and added a firewall rule to block all people visiting my site from Mauritius.

    This may seem like a nuclear option, blocking all people from a country, but I’ve never had a client from Mauritius so it was the easiest route to keep the hacker at bay. I’ve done the same for China and Russia before due to problems like this.

    Was I Personally Targeted?

    No, they scanned my site and probably hundreds of others for the know weakness, stumbled across my site and opened the door I left unlocked. Install Wordfence the security plugin and see how many blocked attempts your site gets. It’s quiet alarming how often your site gets tested, see this screen dump, that’s just a couple of hours.

    They didn’t do anything malicious, they just injected code for fun I think. They did that because they could, that’s motivation enough for some people.

    I added My Own Site To My Maintenance Plan

    Once I realised I had been hacked I added my own site into my own maintenance plan. Why am I not doing that already you ask? Well as usual I’m so busy looking after other people site’s my own site is always relegated to second place. A rookie mistake.

    A scan showed up a vulnerability in the plugin mentioned above straight away, if I was doing proper monitoring of my site this would have been spotted sooner and fixed.

    Remember kids, do what I say not what I do :).

    Site Clean UP

    I patched the vulnerability, cleaned up my site and blocked countries access.

    Wrap UP

    Our sites are constantly being scanned for weaknesses but hackers, can I suggest you do what I did and sign up for my ongoing maintenance plan where I’ll monitor for and react to any security weaknesses on your site.

    This is not the first time this has happened and I’m sure it won’t be the last, make sure you monitor your site for security issues.

    Photo by Kasia Derenda on Unsplash

  • Adding a Wishlist to Your WooCommerce Store

    Adding a Wishlist to Your WooCommerce Store

    Introduction – Adding a Wishlist to Your WooCommerce Store

    In the competitive landscape of e-commerce, enhancing the shopping experience for customers is paramount. One effective way to delight your customers and encourage repeat purchases is by incorporating a wishlist feature into your WooCommerce store. A wishlist allows users to save products they’re interested in for future reference, making it easier for them to keep track of items they love. In this blog post, we’ll explore the benefits of adding a wishlist to your WooCommerce store and how you can do it effortlessly using plugins.

    The Value of a Wishlist

    A wishlist serves as a virtual shopping cart for customers to bookmark products they’re considering purchasing. Here’s why it’s a valuable addition to your WooCommerce store:

    1. Enhanced User Experience: Providing a wishlist feature enables customers to curate their shopping preferences and revisit them conveniently at any time, fostering engagement and loyalty.
    2. Increased Sales Potential: Wishlist functionality encourages customers to return to your store to complete their purchases, leading to higher conversion rates and revenue generation.
    3. Insight into Customer Preferences: Analyzing wishlist data provides valuable insights into customer preferences and trends, allowing you to tailor your product offerings and marketing strategies accordingly.

    How to Add a Wishlist to Your WooCommerce Store

    Adding a wishlist feature to your WooCommerce store is straightforward, thanks to dedicated plugins. Here’s how you can do it:

    1. Choose a Wishlist Plugin: There are several plugins available for integrating a wishlist into your WooCommerce store. Some popular options include:
    • YITH WooCommerce Wishlist: A feature-rich plugin that allows customers to create and manage multiple wishlists, share wishlists with friends, and receive email notifications about wishlist activity.
    • WooCommerce Wishlist: Developed by WooCommerce, this plugin seamlessly integrates with your store and offers customizable wishlist buttons and pages.
    • TI WooCommerce Wishlist: A lightweight yet powerful plugin that enables users to add products to their wishlist without needing to log in.
    1. Install and Activate the Plugin: Choose the wishlist plugin that best suits your store’s needs, install it via your WordPress dashboard, and activate it.
    2. Customize Settings (Optional): Depending on the plugin you’ve chosen, you may have the option to customize wishlist settings such as button styles, placement, and user permissions.
    3. Add Wishlist Functionality to Product Pages: Once the plugin is activated, wishlist functionality will typically be automatically added to your product pages. Customers can then click a button to add products to their wishlist.
    4. Display Wishlist Page: Most wishlist plugins create a dedicated page where users can view and manage their wishlists. Make sure to link to this page from your site’s navigation or footer menu for easy access.

    Conclusion

    Adding a wishlist feature to your WooCommerce store is a simple yet effective way to enhance the shopping experience for your customers and drive sales. By enabling users to save and revisit their favorite products, you can foster engagement, increase customer satisfaction, and gain valuable insights into their preferences. With a wide range of wishlist plugins available, you can easily find one that suits your store’s specific needs and customization preferences.

    Ready to take your WooCommerce store to the next level? Explore the options mentioned in this post and start delighting your customers with wishlist functionality today!

    If you need help setting up a wish list for your WooCommerce store get in touch.

    Photo by Saad Chaudhry on Unsplash

  • A Guide to Bulk Categorizing WooCommerce Products

    A Guide to Bulk Categorizing WooCommerce Products

    As your WooCommerce store grows, organizing your products becomes increasingly important for both you and your customers. Proper categorization not only enhances the shopping experience by making it easier for customers to find what they’re looking for but also streamlines your store management process. If you’re dealing with a large number of products, manually categorizing them can be time-consuming and tedious. Fortunately, WooCommerce offers built-in tools and third-party solutions to help you bulk categorize your products efficiently. In this blog post, we’ll explore various methods for bulk categorizing WooCommerce products to save you time and effort.

    Why Bulk Categorization Matters

    Efficient product categorization is essential for several reasons:

    1. Improved User Experience: Well-organized product categories make it easier for customers to navigate your store and find the products they’re interested in, leading to higher conversion rates and customer satisfaction.
    2. Simplified Management: Proper categorization streamlines store management tasks such as inventory management, pricing updates, and promotional activities, allowing you to stay organized and focused on growing your business.
    3. SEO Benefits: Clear product categories and hierarchies can improve your store’s search engine visibility, making it easier for potential customers to discover your products online.

    Method 1: Using WooCommerce Bulk Edit Feature

    WooCommerce provides a built-in bulk edit feature that allows you to update multiple product attributes simultaneously. Here’s how you can use it to bulk categorize your products:

    1. Navigate to Products: Go to your WooCommerce dashboard and navigate to Products > All Products.
    2. Select Products: Use the checkboxes to select the products you want to categorize.
    3. Bulk Edit: From the Bulk Actions dropdown menu, choose Edit and click Apply.
    4. Update Categories: In the Bulk Edit form, locate the Categories field and add or remove categories as needed. You can also create new categories on the fly.
    5. Save Changes: Once you’ve made your changes, click the Update button to save your updates.

    Method 2: Utilizing Bulk Category Management Plugins

    For more advanced bulk categorization capabilities, you can leverage plugins specifically designed for managing WooCommerce categories in bulk. Here are a few popular options:

    1. Bulk Table Editor: This plugin provides a spreadsheet-like interface for managing WooCommerce products and categories in bulk. You can filter products by category, update multiple products at once, and perform various bulk actions with ease.
    2. WooCommerce Product CSV Import Suite: With this plugin, you can import and export product data using CSV files, making it easy to update product categories in bulk. You can map CSV columns to WooCommerce product fields, including categories, and perform bulk updates efficiently.
    3. WooCommerce Advanced Bulk Edit: This plugin offers powerful bulk editing capabilities for WooCommerce products, including category management. You can filter products by category, apply changes to multiple products at once, and save time on repetitive tasks.

    Method 3: Using WP All Import Plugin

    WP All Import is a versatile WordPress plugin that allows you to import and update WooCommerce products in bulk using XML or CSV files. Here’s how you can use it to bulk categorize products:

    1. Prepare Your Data: Organize your product data in a CSV or XML file, including columns for product ID and category.
    2. Map Data Fields: Use WP All Import’s intuitive interface to map your CSV or XML columns to WooCommerce product fields, including categories.
    3. Import Products: Upload your data file to WP All Import and initiate the import process. WP All Import will update product categories based on the mappings you’ve configured.
    4. Review and Confirm: Once the import is complete, review your products to ensure that categories have been updated correctly.

    Conclusion

    Bulk categorizing WooCommerce products doesn’t have to be a daunting task. By leveraging built-in features, third-party plugins, or import/export tools like WP All Import, you can streamline the process and save valuable time. Whether you’re organizing a large inventory or adding new products regularly, efficient categorization is key to maintaining a well-organized and user-friendly store. Try out the methods mentioned in this post and take control of your WooCommerce product categories today!

    If you need help bulk categorising your products get in touch.

    Photo by v2osk on Unsplash

  • Importing WooCommerce Products with WP All Import

    Importing WooCommerce Products with WP All Import

    Introduction – Importing WooCommerce Products with WP All Import

    Are you looking to expand your e-commerce offerings or streamline your product management process on your WooCommerce store? Importing products efficiently and accurately is crucial for maintaining an up-to-date inventory and offering a diverse range of products to your customers. In this blog post, we’ll explore how you can effortlessly import WooCommerce products using WP All Import, a powerful tool designed to simplify data import tasks. Let’s dive in!

    Why Importing WooCommerce Products Matters

    As your e-commerce business grows, manually adding or updating products becomes increasingly time-consuming and prone to errors. Whether you’re adding new products, updating existing ones, or migrating from another platform, a robust import solution can save you countless hours and ensure data accuracy. By automating the import process, you can focus your time and resources on other aspects of your business, such as marketing, customer service, and product development.

    Introducing WP All Import for WooCommerce

    WP All Import is a versatile WordPress plugin that empowers you to import any XML or CSV file into WordPress. With the WooCommerce add-on, WP All Import becomes even more powerful, allowing you to seamlessly import products, variations, images, and more directly into your WooCommerce store. Whether you’re importing a handful of products or thousands, WP All Import simplifies the process, offering flexibility and customization options to suit your specific needs.

    Key Features of WP All Import for WooCommerce

    1. Intuitive Interface: WP All Import provides a user-friendly interface that guides you through the import process step by step. Even if you’re not a technical expert, you can easily navigate the plugin and import products with confidence.
    2. Support for Various Data Formats: Whether your product data is stored in XML, CSV, or Excel format, WP All Import can handle it all. You can map your data fields to WooCommerce product attributes effortlessly, ensuring seamless integration with your store.
    3. Bulk Importing: Save time by importing hundreds or thousands of products in one go. WP All Import’s bulk importing capabilities enable you to update your entire product catalog quickly and efficiently.
    4. Advanced Mapping Options: Customize the import process to match your specific requirements. With WP All Import, you can map product attributes, categories, tags, prices, and more, ensuring that your products are imported accurately and consistently.
    5. Automatic Image Handling: WP All Import can automatically import product images from external URLs or local files, eliminating the need to upload images manually. You can also resize and optimize images during the import process to improve site performance.
    6. Scheduled Imports: Set up scheduled imports to automatically update your product catalog at predefined intervals. Whether you want to sync your inventory daily, weekly, or monthly, WP All Import makes it easy to keep your store up to date.

    How to Import WooCommerce Products with WP All Import

    1. Install WP All Import: Install and activate WP All Import and the WooCommerce add-on on your WordPress site.
    2. Prepare Your Data: Organize your product data in XML, CSV, or Excel format, ensuring that it includes all the necessary fields such as product name, description, price, and category.
    3. Map Your Data Fields: Use WP All Import’s intuitive mapping interface to map your data fields to WooCommerce product attributes. You can also set default values, perform calculations, and apply custom logic during the mapping process.
    4. Import Your Products: Upload your data file to WP All Import and initiate the import process. WP All Import will process your data file and import your products into WooCommerce according to your specifications.
    5. Review and Update: Once the import is complete, review your imported products to ensure that everything looks correct. You can make any necessary adjustments directly within WooCommerce.
    6. Schedule Regular Imports (Optional): Set up scheduled imports to automatically update your product catalog on a recurring basis. This ensures that your store always reflects the latest inventory and pricing information.

    Conclusion

    Importing WooCommerce products with WP All Import is a game-changer for e-commerce store owners looking to streamline their operations and stay ahead of the competition. Whether you’re adding new products, updating existing ones, or migrating from another platform, WP All Import offers unmatched flexibility, reliability, and ease of use. By automating the import process, you can save time, reduce errors, and focus on growing your business.

    Ready to take your e-commerce store to the next level? Try WP All Import for WooCommerce today and experience the power of effortless product management.

    If you need help doing a WooCommerce product import get in touch.

    Download WP All Import
    Learn More about the WooCommerce Add-On

  • WooCommerce Shipping Insurance

    WooCommerce Shipping Insurance

    Introduction – WooCommerce Shipping Insurance

    In the bustling world of e-commerce, ensuring that your customers receive their orders intact and on time is paramount. However, despite our best efforts, packages can sometimes encounter mishaps during transit, leading to damage, loss, or theft. This is where shipping insurance comes into play, offering an added layer of protection for both merchants and customers alike. In this blog post, we’ll delve into the significance of shipping insurance for WooCommerce users and explore how the E-commerce Shipping Insurance plugin can streamline this process seamlessly.

    The Importance of Shipping Insurance

    Shipping insurance serves as a safety net in the unpredictable landscape of logistics. While carriers strive to handle packages with care, accidents can still occur. From rough handling to unforeseen weather events, numerous factors can jeopardize the integrity of shipments. Without adequate insurance, merchants may find themselves shouldering the financial burden of replacing lost or damaged goods, potentially denting their bottom line and reputation.

    Moreover, shipping mishaps can lead to dissatisfied customers, eroding trust and loyalty. By offering shipping insurance, merchants demonstrate their commitment to customer satisfaction and peace of mind. This proactive approach not only safeguards against unforeseen circumstances but also instills confidence in buyers, fostering long-term relationships and repeat business.

    Introducing the E-commerce Shipping Insurance Plugin

    For WooCommerce users seeking a hassle-free solution to implement shipping insurance, the WooCommerce Shipping Insurance plugin emerges as a game-changer. Developed with user convenience in mind, this plugin seamlessly integrates into your WooCommerce store, empowering you to offer insurance options to customers effortlessly.

    Key Features:

    1. Easy Integration: The plugin seamlessly integrates into your existing WooCommerce setup, requiring minimal configuration to get started.
    2. Flexible Coverage Options: Tailor insurance options to suit your specific needs, including coverage for loss, damage, or theft during transit.
    3. Automated Calculations: Eliminate manual calculations and streamline the insurance process with automated premium calculations based on order value or shipping destination.
    4. Transparent Pricing: Provide customers with clear, transparent pricing for insurance premiums, fostering trust and transparency in your e-commerce transactions.
    5. Claims Management: Simplify claims management with built-in tools to process and track claims efficiently, ensuring prompt resolution for both merchants and customers.
    6. Customizable Settings: Customize insurance settings according to your preferences, such as coverage limits, deductible amounts, and eligible shipping methods.

    How It Works

    Implementing shipping insurance with the E-commerce Shipping Insurance plugin is straightforward:

    1. Installation: Install and activate the plugin directly from the WordPress repository, and configure settings to align with your business requirements.
    2. Enable Insurance Options: Enable insurance options on your WooCommerce checkout page, allowing customers to add insurance to their orders seamlessly.
    3. Automated Premium Calculation: Based on predefined criteria, the plugin automatically calculates insurance premiums, providing customers with transparent pricing before completing their purchase.
    4. Claims Processing: In the event of a shipping mishap, customers can initiate claims directly through your WooCommerce store, triggering a streamlined claims processing workflow.
    5. Resolution and Compensation: Upon verifying the claim, the insurance provider facilitates compensation for the customer, alleviating the financial burden on both parties and reinforcing trust in your brand.

    Conclusion

    In the dynamic world of e-commerce, mitigating risks and enhancing customer satisfaction are paramount to sustained success. With the E-commerce Shipping Insurance plugin for WooCommerce, merchants can offer comprehensive shipping insurance options seamlessly, bolstering confidence and trust among customers. By prioritizing the protection of shipments and ensuring prompt resolution of claims, businesses can navigate the complexities of logistics with ease, fostering enduring relationships and driving growth in the competitive e-commerce landscape.

    Enhance your e-commerce peace of mind today with WooCommerce Shipping Insurance – because safeguarding shipments is not just a priority, but a commitment to customer-centric excellence.

    If you need help setting up shipping insurance get in touch.

    Photo by CHUTTERSNAP on Unsplash

  • Why You Should NOT Sign Up For Your Developers Hosting Plan

    Why You Should NOT Sign Up For Your Developers Hosting Plan

    Here’s a word of warning from a WordPress developer. If your current developer suggests you sign up for their hosting plan say no!

    A lot of developers and agencies offer hosting plans for a slice of that delicious recurring revenue, it sounds like a great deal, fully managed hosting, and 99% of the time it will work out well, until there is an issue, that’s when the SHTF.

    I don’t offer hosting myself for that 1% of grief is just not worth the few quid I could earn each month.

    You Are Giving Away Control Of Your Site.

    Here’s the big take away from this blog post, once you pass your hosting over to your developer your lose control over your website.

    If you register your domain through your developers hosting account that’s even worse they have complete control over our website, domain name, email. This is a terrible place to be in.

    It’s Probably Going To Be Okay.

    I’m going to show you the terrible 1% in the rest of this post, most agencies and developer are legit and won’t hold you to ransom, what I’m suggesting is you always keep complete control over your website and domain name.

    Access To Your Site Can Be Revoked.

    If you give control over your website to your developer and have them host your site the upside is there are no hosting issues to worry about, the downside is access to your site can be revoked and your site taken offline.

    Failure to pay bills (by you and your developer to their hosting provider), a break down in your client / service provider relationship, illness or price rises are just some reasons that you may fall out with your developer and cause your site to be taken offline.

    Your developer can hold you to ransom, stop any future development you need and tank your website. The worst thing I have seen is sites taken offline due to issues between developers and clients.

    I’ve Seen The Client Developer Relationship Go Wrong So Many Times

    I’ve worked with hundreds of clients and (fingers crossed) most of my relationships have been great. But I’ve seen that relationship break down from my side and the clients a number of times. If that relationship breaks down you need to extract your site.

    Scope creap, difficult clients and lack of time can sour the relationship from developer to client.

    Increasing fees, poor quality work and lack of communication or availability can spoil the client to developer relationship.

    These working relationships can and will end, be aware of that and have 100% control over your site.

    I’ve seen developer dump their now ex-clients a zip file and send them on their way with no support to restore that to another hosting provider.

    It’s Not Hard To Host A Website

    With modern hosting companies it’s not that hard to host a website anymore, the tech support from that firm will help you to keep your site online.

    If that is still to much you can get your own hosting and registration then …

    Pay Your Developer To Manage Your Site On Your Hosting

    What’s the solution to this problem, setup your own hosting and registration of your domain name, then pay your developer to mange that hosting on your behalf. It’s not a problem for us developers to work on someone’s hosting account.

    If your developer tells you it is a problem, be wary.

    Case Study: The Developer Became Sick

    This blog post has been prompted by a real life issue one of my clients is seeing. The old developer has become seriously ill and was unable to provide their services. The huge issue is that the client also hosts their website with that developer. We are struggling with things like creating sub domains and managing hosting settings.

    The client had to contact the hosting company, provide proof they own the site and then move the site to their own hosting.

    It’s a huge pain so use this warning to host your own site on an account you control.

    Wrap Up

    Nothing to sell here, I don’t have a hosting package to flog, oh wait, if you need help migrating away from your developer to your own hosting account please get in touch I have a fixed price package.

    Photo by Stephen Phillips – Hostreviews.co.uk on Unsplash

  • Prepopulate a Select Field in Gravity Forms with User Data

    Prepopulate a Select Field in Gravity Forms with User Data

    Introduction: Prepopulate a Select Field in Gravity Forms with User Data
    Gravity Forms is a versatile tool for creating forms on WordPress sites, and prepopulating select fields with user data can significantly enhance user experience and streamline data entry. Whether you’re collecting preferences, membership levels, or any other user-specific information, prepopulating select fields with user data can simplify form completion and improve form conversion rates. In this blog post, we’ll explore the process of prepopulating a select field in Gravity Forms with user data, enabling you to create personalized and user-friendly forms effortlessly.

    Step 1: Identify the Form and Field:
    First, identify the form ID and the ID of the select field you want to prepopulate. You can find this information by inspecting the form using browser developer tools or by accessing the form settings in the WordPress dashboard.

    Step 2: Hook into gform_pre_render:
    Add a function to hook into the gform_pre_render filter. This function will manipulate the form object before it is rendered.

    add_filter('gform_pre_render', 'populate_select_field_with_user_data');
    
    function populate_select_field_with_user_data($form) {
        // Specify the form ID and the ID of the select field
        $form_id = 1;
        $field_id = 2;
    
        // Check if the current form matches the specified form ID
        if ($form['id'] == $form_id) {
            // Retrieve current user data
            $current_user = wp_get_current_user();
            $user_data = array(
                'User ID' => $current_user->ID,
                'Username' => $current_user->user_login,
                'Email' => $current_user->user_email,
                // Add more user data fields as needed
            );
    
            // Prepare choices array for the select field
            $choices = array();
            foreach ($user_data as $label => $value) {
                $choices[] = array(
                    'text' => $value,
                    'value' => $value,
                );
            }
    
            // Find the select field by ID
            foreach ($form['fields'] as &$field) {
                if ($field->id == $field_id) {
                    // Update choices for the select field
                    $field->choices = $choices;
                    break;
                }
            }
        }
    
        return $form;
    }

    Step 3: Retrieve User Data:
    Retrieve the desired user data using WordPress functions such as wp_get_current_user(). You can access various user properties such as ID, username, email, and more.

    Step 4: Prepare Choices Array:
    Prepare an array of choices using the retrieved user data. Each choice should consist of a label (e.g., user email) and a corresponding value (e.g., user email).

    Step 5: Update Form Choices:
    Find the select field within the form array using its ID and update its choices with the prepared array of user data.

    Step 6: Test and Deploy:
    Test the form to ensure that the select field is prepopulated with the desired user data. Once confirmed, deploy the form on your WordPress site.

    Conclusion:
    Prepopulating a select field in Gravity Forms with user data offers a convenient way to personalize forms and streamline data entry. By leveraging the gform_pre_render filter hook and WordPress functions, developers can dynamically populate select fields with user-specific information, enhancing the overall user experience. Whether you’re collecting user preferences, contact details, or any other type of user data, integrating user data into select fields can simplify form completion and improve form conversion rates. Follow the steps outlined in this guide to seamlessly prepopulate select fields in Gravity Forms with user data and create personalized forms tailored to your users’ needs.

    If you need help coding a user solution like this please get in touch

    Photo by Agence Olloweb on Unsplash.

  • Prepopulate Gravity Form Select Fields with Custom Taxonomy Terms: A Step-by-Step Guide

    Prepopulate Gravity Form Select Fields with Custom Taxonomy Terms: A Step-by-Step Guide

    Introduction: Prepopulate Gravity Form Select Fields with Custom Taxonomy Terms
    Gravity Forms is a powerful tool for creating forms on WordPress sites, offering a wide range of functionalities for collecting data. Prepopulating select fields with custom taxonomy terms adds another layer of versatility to Gravity Forms, enabling users to select predefined options from taxonomies effortlessly. In this blog post, we’ll explore how to prepopulate Gravity Form select fields with custom taxonomy terms, allowing for streamlined form creation and enhanced user experience.

    Understanding Custom Taxonomies in WordPress:
    Before diving into prepopulating select fields in Gravity Forms, it’s essential to grasp the concept of custom taxonomies in WordPress. Taxonomies are a way to group content into categories, tags, or custom classifications. While categories and tags are built-in taxonomies, WordPress allows users to create custom taxonomies to classify content in a more structured manner.

    Creating Custom Taxonomies:
    To create custom taxonomies in WordPress, you can utilize functions like register_taxonomy(). Here’s a basic example of registering a custom taxonomy named “Product Categories”:

    function custom_taxonomy_product_categories() {
        $labels = array(
            'name' => 'Product Categories',
            'singular_name' => 'Product Category',
            'menu_name' => 'Product Categories',
        );
    
        $args = array(
            'labels' => $labels,
            'public' => true,
            'hierarchical' => true,
        );
    
        register_taxonomy('product_category', 'post', $args);
    }
    
    add_action('init', 'custom_taxonomy_product_categories');

    This code registers a hierarchical taxonomy named “Product Categories” that can be associated with posts.

    Prepopulating Gravity Form Select Fields:
    Once you’ve created your custom taxonomy, you can proceed to prepopulate select fields in Gravity Forms with the taxonomy terms. This can be achieved using the gform_pre_render filter hook. Below is a step-by-step guide to prepopulate a select field with custom taxonomy terms:

    Step 1: Identify the Form and Field:
    Determine the form ID and the ID of the select field you wish to prepopulate. You can find this information by inspecting the form using browser developer tools or by accessing the form settings in the WordPress dashboard.

    Step 2: Hook into gform_pre_render:
    Add a function to hook into the gform_pre_render filter. This function will manipulate the form object before it is rendered.

    add_filter('gform_pre_render', 'populate_taxonomy_terms');
    
    function populate_taxonomy_terms($form) {
        // Specify the form ID and the ID of the select field
        $form_id = 1;
        $field_id = 2;
    
        // Check if the current form matches the specified form ID
        if ($form['id'] == $form_id) {
            // Retrieve custom taxonomy terms
            $terms = get_terms(array(
                'taxonomy' => 'product_category',
                'hide_empty' => false, // Include empty terms
            ));
    
            // Prepare choices array for the select field
            $choices = array();
            foreach ($terms as $term) {
                $choices[] = array(
                    'text' => $term->name,
                    'value' => $term->term_id,
                );
            }
    
            // Find the select field by ID
            foreach ($form['fields'] as &$field) {
                if ($field->id == $field_id) {
                    // Update choices for the select field
                    $field->choices = $choices;
                    break;
                }
            }
        }
    
        return $form;
    }

    In this example, we’re populating a select field with custom taxonomy terms from the “product_category” taxonomy.

    Step 3: Update Form Choices:
    Retrieve the custom taxonomy terms using get_terms() and prepare an array of choices with term names as labels and term IDs as values. Then, find the select field within the form array and update its choices accordingly.

    Step 4: Test and Deploy:
    Test the form to ensure that the select field is populated with the desired custom taxonomy terms. Once confirmed, deploy the form on your WordPress site.

    Conclusion:
    Prepopulating Gravity Form select fields with custom taxonomy terms offers a convenient way to streamline form creation and enhance user experience. By leveraging the gform_pre_render filter hook, developers can dynamically populate select fields with taxonomy terms, providing users with predefined options to choose from. Whether you’re creating product order forms, event registration forms, or any other type of form, integrating custom taxonomy terms can simplify data collection and improve form usability. Follow the steps outlined in this guide to seamlessly prepopulate Gravity Form select fields with custom taxonomy terms and unlock the full potential of your WordPress forms.

    If you need help coding up a solution to prepopulate your forms with taxonomy content please get in touch.

    Photo by Rob Curran on Unsplash